
Free Shipping in the USA on nearly all items!
Limited phone hours during the Holidays! Call us: 888-611-9305
Free Shipping in the USA on nearly ALL items! Limited phone hours during the Holidays!

Size your exhaust fan by tent volume, add 20% headroom for filter and duct losses, and run it as a negative-pressure, open-loop system. That single decision prevents most heat, humidity, and odor problems before they start. The core kit is simple: an inline exhaust fan, a carbon filter, a passive or active intake, circulation fans for canopy movement, and a controller to manage speed automatically.
TL;DR:
- Proper sizing of your exhaust fan requires calculating tent volume, adding 20% headroom, and accounting for filter resistance, duct length, bends, and heat output.
- Using a pull-through configuration with a matched fan and filter rated for the same CFM ensures better odor control and system efficiency.
- For typical open-loop setups, a full air exchange every one to three minutes is recommended, adjusted upward for real-world losses and warmer environments.
- Installing the system with the filter at the top, ducting with minimal bends, and sealing all joints prevents odor leaks and airflow issues.
- Automated controllers that adjust fan speed based on temperature and humidity improve climate stability while reducing energy costs.
A real grow tent ventilation guide answers one question first: how much air do you need to move, and with what equipment? Everything else, filter choice, duct routing, controller settings, exists to support that number. Growers who skip the math tend to buy an oversized fan they run at half throttle (fine, if noisy) or an undersized one that can never keep pace with a flowering canopy under a bright light (not fine).
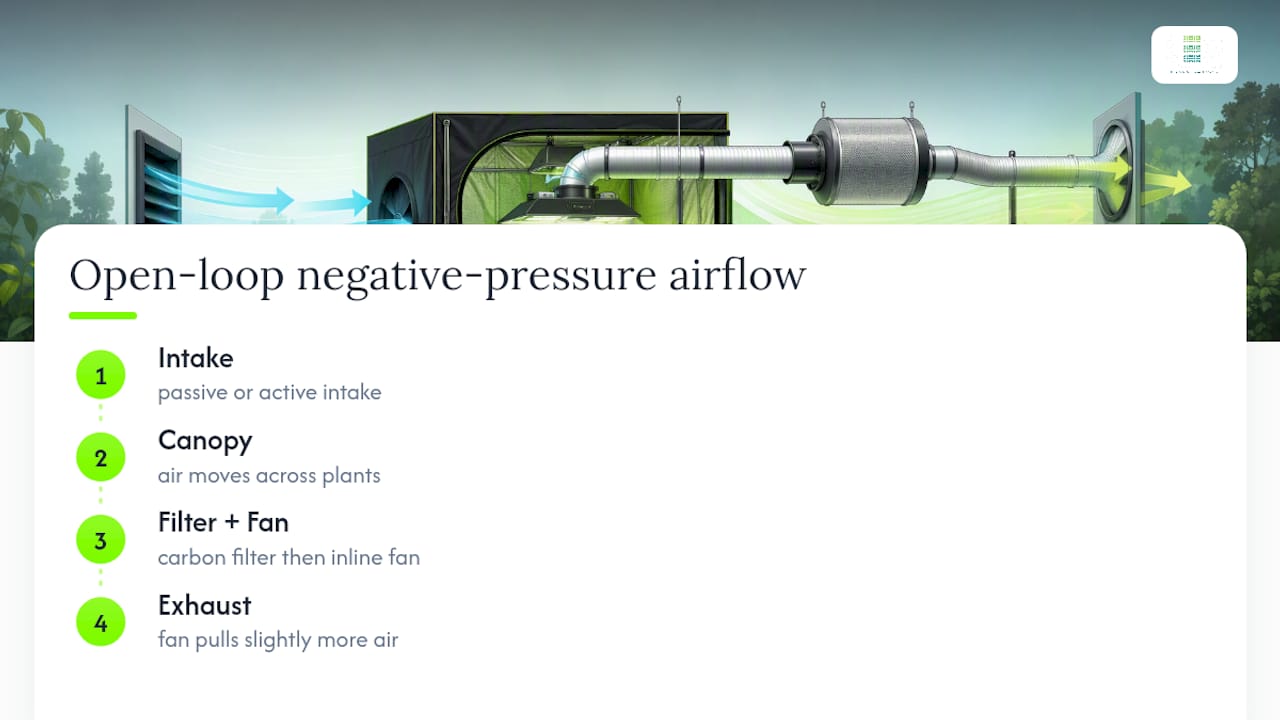
The standard architecture for a hobby tent is an open-loop, negative-pressure system. Air gets pulled in through a passive or active intake, moves across the canopy, and gets exhausted through a carbon filter and inline fan to the outside. Negative pressure means the fan pulls out slightly more air than the intake lets in, so the tent walls draw in a little rather than puff out. That’s not a cosmetic detail. It’s how you keep odor and humidity from leaking out through zipper seams instead of through your filter.
This differs from sealed or closed-loop rooms, which trade continuous exhaust for CO2 enrichment and rely on air conditioning and dehumidification instead. Most home growers with a single tent don’t need that complexity, and this guide focuses on the setup that covers the vast majority of grow tent air circulation needs: standard open-loop exhaust with proper CFM sizing.
Five components make up a functional grow tent fan setup.
Pro Tip: Buy your carbon filter and inline fan as a matched pair rated for the same CFM range. Mismatched components are the single most common reason growers end up under-filtered or under-powered.
The base formula is simple: multiply tent length, width, and height in feet to get volume, then divide by your target exchange time in minutes. A good rule of thumb is to fully exchange the air in an open-loop tent every one to three minutes, with sealed CO2 rooms running slower at three to five minutes since they’re not trying to purge air as aggressively.
That base number is only a starting point. You then need to adjust upward for real-world losses:
After those adjustments, add at least 20% headroom on top of the final number. Buying a fan rated above your calculated requirement lets you run it below full speed, which is quieter and gives you room to compensate as filters age and ducting accumulates dust.
Worked examples: A 3×3×6.5 foot tent holds about 58.5 cubic feet. Targeting a two-minute exchange gives a base need of roughly 29 CFM, and after headroom and filter loss, you’re shopping in the 150 to 200 CFM class once you account for real-world resistance rather than open-air ratings. A 4×4×6.5 tent holds 104 cubic feet, pushing the base number toward 52 CFM before adjustment. A 5×5×7 tent holds 175 cubic feet, and a two-minute target puts base demand near 87 CFM, before the same filter and duct penalties apply.
Those base numbers look small next to the CFM ratings printed on fan boxes, and that gap is exactly the point. A fan advertised at 200 CFM open air might deliver closer to 140 to 160 CFM once a carbon filter and six feet of ducting are attached, which is why you size up rather than sizing to the bare minimum.
Installation order matters as much as component choice. Here’s the sequence that avoids the most common setup mistakes:
The step-by-step approach of hanging the filter first and running the fan in pull-through mode is standard practice for a reason: it’s the configuration least likely to leave you troubleshooting odor leaks later.
Pro Tip: After sealing your ducting, do a five-minute test run and walk the perimeter of your tent checking for the smell of fresh air near the zippers. If you catch a whiff, you’ve got a leak worth chasing down now rather than during flower.
Open-loop, negative-pressure exhaust is the right default for the overwhelming majority of hobby setups, and everything in this guide assumes that configuration unless stated otherwise.
Unless you’re running supplemental CO2 and have AC and dehumidification already in place, open loop is the simpler, cheaper, and more forgiving choice.
Static pressure is the resistance air encounters as it moves through filters, ducting, and bends, and it’s the reason a fan’s box rating rarely matches what you actually get. An inline fan’s published CFM is typically measured open air, with nothing attached, so real performance under load depends on how much resistance your specific setup creates.
Use fan pressure curves if available to estimate real airflow performance under load, considering filter and duct resistance. Insulated ducting can help prevent condensation buildup and reduce noise.
A few fast checks catch most ventilation problems before they cost you a harvest.
Pro Tip: If two fixes don’t resolve a heat or humidity issue, the fan is probably undersized rather than misconfigured. Recalculate CFM with your actual duct length and filter included before troubleshooting further.
A basic thermostat or hygrometer controller lets your exhaust fan speed up and down automatically instead of running at one fixed setting around the clock.
Pairing your exhaust controller with the same automation logic used for lighting schedules keeps your whole environment working from one consistent routine instead of several independent timers fighting each other.
Ventilation is your first and cheapest humidity control tool, but it isn’t the only one. Faster air exchange pulls moist air out before it saturates the canopy, which is why undersized exhaust fans so often show up as chronic humidity problems rather than obvious heat problems.
Where airflow alone isn’t enough, usually in later flower when transpiration peaks, a standalone dehumidifier vented into the same exhaust path adds capacity without asking the fan to work outside its design range. Passive intake tents in humid climates often need this pairing, since incoming air already carries moisture the exhaust fan can’t remove on its own.
Circulation fans play a supporting role here too. Still air over wet leaves creates humid microclimates even when the tent’s average humidity reads fine on a hygrometer mounted near the top. Gentle, constant leaf movement from circulation fans keeps moisture from pooling at the canopy, which lowers mold and bud rot risk more than exhaust volume alone.
The practical order of operations: size your exhaust CFM correctly first, add circulation fans for even distribution second, and treat a dehumidifier as a targeted fix for late-flower humidity spikes rather than a substitute for adequate air exchange.
Temperature control in a grow tent comes down to how fast you can remove heat generated by your lights, and airflow is the primary lever. LED fixtures run cooler than older HID setups, but even efficient lighting adds heat that has to go somewhere, and an undersized exhaust fan lets that heat accumulate at canopy height where it stresses plants first.
Position your exhaust fan and filter near the top of the tent, since heat naturally rises and concentrates there. Pulling exhaust from the hottest point in the tent is more efficient than exhausting from a mid-height port and leaving warm air trapped above the canopy.
Ambient room temperature sets your ceiling. A tent in a warm attic or garage needs a faster exchange rate and possibly a larger fan than the same tent in a climate-controlled basement, because incoming intake air is already warmer than ideal. If your intake air regularly exceeds 80°F, no amount of exhaust volume fully compensates, and you’ll need to address the room’s ambient temperature directly.
Circulation fans prevent hot pockets from forming even when overall exhaust is adequate. A canopy with poor internal air movement can run several degrees hotter at leaf level than the ambient tent reading suggests, since heat and humidity both build up in still air near dense foliage.
A carbon filter does most of the odor control work, but the ventilation system around it determines whether that filter performs to spec or gets bypassed entirely. Negative pressure is the mechanism that forces every cubic foot of exhausted air through the carbon bed instead of leaking out through zipper seams, mesh vents, or duct gaps. Positive pressure, even mild, pushes unfiltered odor straight past your filter and into the room.
Duct sealing matters just as much as filter quality. A perfectly sized carbon filter connected to a loosely taped duct joint still leaks odor at that joint, since air always follows the path of least resistance. Foil tape and proper clamps at every connection point aren’t just for airflow efficiency. They’re an odor control measure in their own right.
Exhaust point placement outside the tent also affects perceived odor control. Venting into a small closet or unventilated closed room just relocates the smell rather than removing it. Exhausting to a space with its own air movement, or outdoors, prevents that buildup from finding its way back into living spaces.
Filter lifespan connects directly to ventilation load. A filter running near its rated CFM ceiling wears out faster than one with headroom, since more air is worked at higher velocity, which shortens the porous carbon’s effective life and lets odor compounds start slipping through earlier than expected.
Inline fans are a fraction of a grow tent’s total energy draw compared to lighting, but running an oversized fan at full speed around the clock adds up over a multi-month grow cycle. This is one of the strongest arguments for sizing with headroom rather than buying the biggest fan available.
A fan sized correctly for your tent, with 20% headroom built in, lets you run it at a reduced speed most of the time. Reducing fan speed cuts power draw more than proportionally, since fan motors follow a curve where small speed reductions produce meaningful energy savings. Running a properly sized fan at 70 to 80% capacity uses noticeably less electricity than running an undersized fan at 100% just to keep pace with a hot tent, and it’s quieter too.
Controllers add efficiency on top of correct sizing. A thermostat-driven fan that ramps up only when temperature or humidity actually demands it uses less power over a full day than a fan running at one fixed speed regardless of conditions. Pairing your exhaust controller with your lighting schedule means peak fan speed lines up with peak heat output during light hours, and the fan can idle lower overnight when the tent naturally cools.
Duct and filter maintenance also factors into energy use. A dusty filter or crushed duct run forces a fan to work harder to move the same volume of air, drawing more power for less airflow. Cleaning or replacing a filter on schedule keeps the whole system running closer to its efficient operating point.
Grow tents combine electrical equipment, heat-generating lights, and enclosed fabric spaces, which makes basic electrical safety non-negotiable rather than optional.
Never overload a single outlet or power strip with your fan, lights, and controllers combined. Use a dedicated circuit where possible, and check that your power strip or surge protector is rated for the combined wattage of everything plugged into it. Grow room fires most often trace back to overloaded circuits or damaged cords, not equipment failure on its own.
Keep all cords and connections away from areas where condensation or water runoff could reach them, particularly near humidifiers, dehumidifiers, or any drip irrigation. Wet electrical connections inside an enclosed tent are a serious hazard that’s easy to overlook once a setup is running.
Inspect ducting and fan housings periodically for dust buildup, since accumulated dust near a warm motor housing is a fire risk that grows the longer a fan runs unmaintained. Vibration isolators reduce wear on fan components over time, which indirectly supports electrical safety by keeping motors from working harder than necessary.
Finally, never leave a tent running unattended for extended periods without some form of monitoring, whether that’s a simple temperature alarm or a smart controller that can alert you to abnormal readings. A controller that flags a stuck fan or a spiking temperature gives you a chance to intervene before a small equipment issue becomes a bigger problem.
Get the CFM math right first, keep duct runs short, and automate fan speed once the physical setup is dialed in. Almost every ventilation complaint traces back to skipping one of those three steps in order. Balancing noise, odor control, and energy use isn’t complicated once sizing and routing are correct. It’s mostly a matter of letting a controller handle the day-to-day adjustments instead of guessing at fan speed by hand.
— Scott
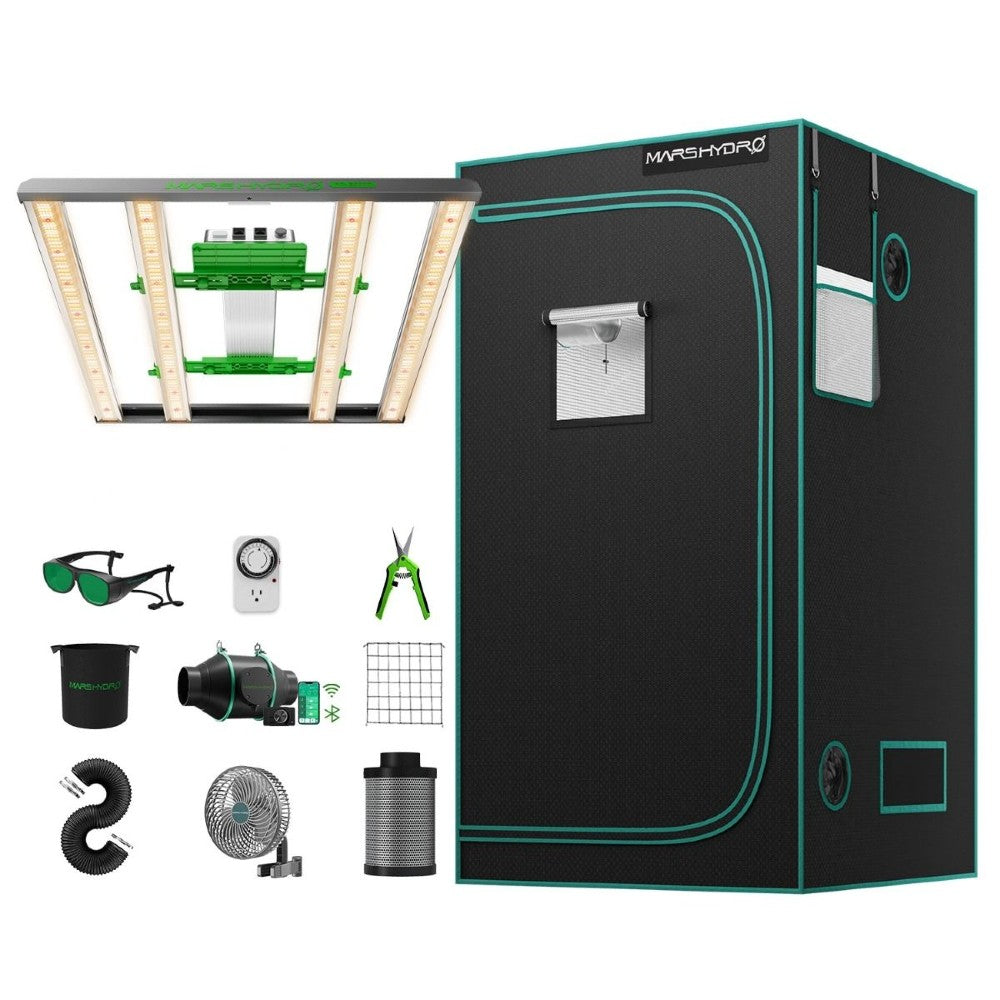
If the CFM calculations above feel like more math than you want to do twice, a pre-matched kit solves the compatibility problem before you ever plug anything in. The Mars Hydro FC-E3000 & 3.3’x3.3’ Complete Grow Tent Kit with 4" iFresh Fan Kit pairs a properly sized exhaust fan and filter to a 3.3×3.3 foot tent footprint, so you’re not guessing whether a 4 inch or 6 inch fan fits your space.
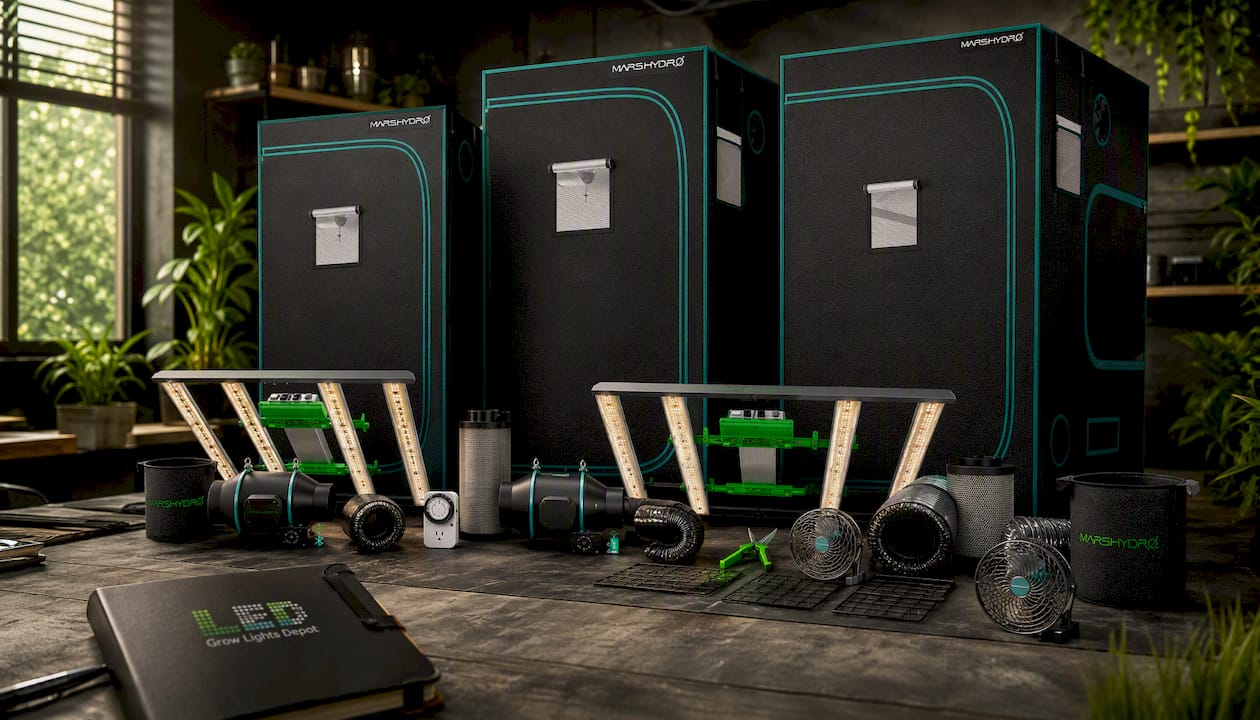
For larger footprints, the Mars Hydro FC-E6500 & 5’x5’ Complete Grow Tent Kit with 6" iFresh Fan Kit and the Mars Hydro FC6500 5’x5’ Grow Tent Kit with 6" iFresh Fan Kit both scale the fan and filter to match a 5×5 tent’s higher CFM requirement, removing the trial and error of pairing a fan rated for one tent size with a filter sized for another. That mismatch is one of the most common setup errors this guide walks through, and a matched kit sidesteps it entirely.
If you’d rather build a custom setup component by component, browse the full range of grow tents and ventilation kits to compare footprints, fan ratings, and filter sizes side by side. And once your ventilation and canopy airflow are dialed in, under-canopy lighting is the next upgrade worth a look for growers chasing better bud density lower on the plant.
Calculate CFM from tent volume divided by your target exchange time, hang the filter and fan in a pull-through configuration near the top, place intake vents low and opposite the exhaust, and confirm negative pressure by watching for tent walls drawing in slightly.
Target a full air exchange every one to three minutes for open-loop tents, then add 20 to 25% for carbon filter resistance and a few more percent for every 10 feet of ducting and each 90 degree bend before adding your headroom margin.
Yes. Without active exhaust and intake, heat and humidity from lights and plant transpiration build up quickly, and stagnant air raises mold, pest, and odor risks even in a small tent.
Yes. LedGrowLightsDepot’s pre-matched tent kits, including the Mars Hydro FC-E3000 3.3x3.3 kit, pair fans and filters to specific tent footprints so you don’t have to run the CFM math yourself.
0 of 3 items selected





Leave a comment