
Free Shipping in the USA on nearly all items!
Limited phone hours during the Holidays! Call us: 888-611-9305
Free Shipping in the USA on nearly ALL items! Limited phone hours during the Holidays!

Divide total watts by voltage to get amps: A 2,000W lighting load on a 120V circuit draws approximately 17 amps with a typical 0.95 power factor applied. Because grow lights run for hours at a stretch, they count as continuous loads under the NEC 80% rule, which pushes that circuit’s actual breaker requirement above 20A. Never size a panel yourself. Bring your numbers to a licensed electrician before flipping the main breaker.
TL;DR:
- Growers should account for power factor and driver efficiency, as they can increase the actual amperage draw beyond simple wattage calculations.
- A 600W LED fixture on 120V at PF 0.95 draws approximately 5.3 amps, requiring a dedicated 20A circuit for larger or multiple fixtures to stay within safety margins.
- Continuous loads like grow lights and HVAC equipment must be sized based on 80% of breaker capacity to prevent overheating and nuisance trips.
- Proper wire gauge and circuit planning are essential, especially for long cable runs or moisture-prone environments, to prevent voltage drops and electrical faults.
- Always gather detailed fixture specs and runtime estimates before hiring an electrician, and ensure permits are obtained for permanent electrical work.
The formula every grower needs first: Amps = Watts ÷ Voltage. For AC circuits, the more accurate version accounts for power factor: Amps = Watts ÷ (Voltage × Power Factor).
Here’s how that plays out with common fixture sizes, assuming a power factor of 0.95, a conservative default when a driver’s spec sheet doesn’t list one:
Once you know your true amp draw, convert that into circuit capacity. A standard 20A/120V breaker safely supports continuous loads up to about 80% of its rating. Two 600W fixtures at 5.3A each total 10.6A, comfortably inside that window with room for a small fan. Three fixtures would push you to 15.9A, right at the edge, which is exactly the kind of margin call that should send you to a second circuit rather than a maxed-out one.
The NEC continuous-load rule exists because grow lights, unlike a toaster, run for 12 to 18 hours a day without a break. That sustained draw heats breakers and wiring differently than intermittent loads, so code requires you to size for 80% of a breaker’s rating rather than its full number.
Here’s how that translates to usable watt limits at 120V:
Wire gauge has to match that amperage. Benwei’s electrical reference and standard NEC ampacity tables put Typical wire gauges correspond approximately to circuit breaker sizes, such as 14 AWG for 15A and 12 AWG for 20A circuits. Undersized wire on a long run, anything past 50 to 75 feet, also invites voltage drop, which shows up as dimmer lights and hotter drivers even when the breaker never trips. Damp grow spaces also call for GFCI protection on every circuit, not just the ones near a water source.
Two hidden factors inflate real-world amp draw beyond the simple watts-over-volts math. The first is power factor (PF), a measure of how efficiently a driver converts AC power into usable current. LED drivers typically run a PF between 0.9 and 0.98, and using 0.95 as your default when the spec sheet is silent keeps your estimate conservative rather than optimistic.
The second is driver efficiency. If a spec sheet lists only the LED module’s output wattage rather than the fixture’s input wattage, your amp calculation will run low. Driver selection guidance from 1000Bulbs recommends using the nameplate input watts whenever it’s available, since that’s the number the wall outlet actually sees.
Inrush current is the third wrinkle: fixtures draw a brief current spike on startup, sometimes several times their running amperage. Powering ten fixtures on one timer at once can trip a breaker that handles them fine once they’re running.
Pro Tip: Stagger fixture startup across two or three timer groups, or choose drivers with soft-start circuitry, to avoid nuisance trips during lights-on.
Every watt your lights consume eventually becomes heat, at a fixed rate of 3.412 BTU/hr per watt. That conversion is why lighting choice drives your cooling bill as much as your lighting bill. HowManyBTUs puts LED heat output at roughly 2,000 to 2,500 BTU per 1,000W, while HID fixtures run 3,000 to 4,000 BTU per 1,000W for the same light output, because more of their input energy leaves as heat instead of light.
That cooling load has to run on its own amps:
HVAC equipment often represents a significant portion of total electrical consumption in grow rooms., which is why it needs its own dedicated circuit rather than sharing a breaker with lights. Oversizing HVAC capacity “just in case” backfires too: an unit that’s too large short-cycles, drawing repeated startup inrush without ever settling into an efficient run.
Real numbers make this concrete. A 4×4 tent running a single 600W LED fixture draws about 5.3A at 120V once PF is applied, comfortably inside a 15A breaker’s 12A continuous limit with 12 AWG wire and margin to spare for a clip fan or humidifier.
Step up to a 10×10 room with 2,000W of total lighting, and you’re looking at roughly 17.5A on lighting alone, which already demands a dedicated 20A circuit at minimum. Add HVAC sized for the resulting sizable cooling load measured in thousands of BTUs per hour: A sizable cooling load measured in thousands of BTUs per hour, and total room draw commonly lands between 30 and 40A across two or more circuits.
| Configuration | Lighting watts | Amps at 120V (PF 0.95) | Recommended breaker |
|---|---|---|---|
| 4×4 tent, 1x 600W LED | 600W | ~5.3A | 15A dedicated |
| 10×10 room, 2,000W lights | 2,000W | ~17.5A | 20A dedicated, plus separate HVAC circuit |
| Multi-fixture, 3x 600W LED | 1,920W | 15.9A | 20A max 2 fixtures per circuit under 80% rule |
That last row is the one growers miscalculate most often. Three 600W fixtures on a single 20A circuit sit right at the 16A continuous ceiling, leaving zero margin for a fan, humidifier, or startup spike. Splitting them across two circuits is the safer call.
Before any permanent electrical work, gather the numbers that make an electrician’s visit fast and accurate. Bring:
Ask directly about panel capacity, whether a subpanel makes sense for a dedicated grow circuit, and whether your municipality requires a permit for the work. LED Grow Lights Depot carries a 4.8 out of 5 rating across more than 5,800 customer reviews, a track record built partly on steering growers toward fixtures that keep amp math manageable in the first place.
Always pull a permit and schedule an inspection for permanent panel or circuit work. Skipping that step risks insurance and resale complications well beyond the grow room itself.
Most residential grow rooms run on standard single-pole breakers, 15A or 20A, feeding 120V circuits from the home’s main panel. These work fine for a single tent or a small closet setup, but they fill up fast once lights, fans, and a dehumidifier all compete for the same panel space.
Double-pole breakers supplying 240V circuits become relevant once you’re running larger fixtures or HVAC equipment, since 240V draws roughly half the amperage of an equivalent 120V load. A 2,000W mini-split at 240V pulls about 8.3A, versus 16.7A on 120V, which is why serious cooling equipment almost always specs 240V.
For anything beyond a single room, a dedicated subpanel makes more sense than continuing to add breakers to an already-crowded main panel. A subpanel isolates your grow circuits, simplifies troubleshooting, and gives you room to grow without another expensive main-panel upgrade later. Commercial-scale operations often add three-phase distribution or multiple balanced breakers specifically to avoid overloading any single leg of the panel. GFCI breakers belong on every circuit in a grow space, given the moisture levels involved, and AFCI protection is worth discussing with your electrician depending on local code requirements.
Grow rooms combine three risk factors most rooms in a house never see together: sustained high loads, standing moisture, and dense equipment clustering. That combination is why grow-room electrical fires and nuisance trips happen more often than in a typical utility closet.
Overloaded circuits top the list. Daisy-chaining power strips to run lights, fans, and a dehumidifier off one outlet is the single most common mistake, and it’s also the easiest to fix: map your actual amp draw per circuit before you plug in a second fixture, not after.
Extension cords rated for light-duty use are another frequent culprit. A cord rated for a lamp will overheat under a 600W fixture’s sustained draw, even if it never trips a breaker. Match cord gauge to fixture amperage, and keep runs short.
Moisture near electrical connections is the third major hazard, covered in more detail below, but it deserves mention here because it interacts with the other two. A slightly overloaded circuit running warm, combined with condensation on a nearby outlet, is a worse combination than either problem alone. Keep timers, ballasts, and power strips elevated off the floor and away from direct spray from misting systems or humidifiers.
Not all fixtures draw the same amps for the same light output, and the gap is larger than most growers expect. HPS and MH fixtures convert a smaller share of input energy into usable light, so a 1,000W HPS fixture and a 1,000W LED fixture pull similar amperage at the wall, but the LED delivers meaningfully more usable light per watt to the canopy.
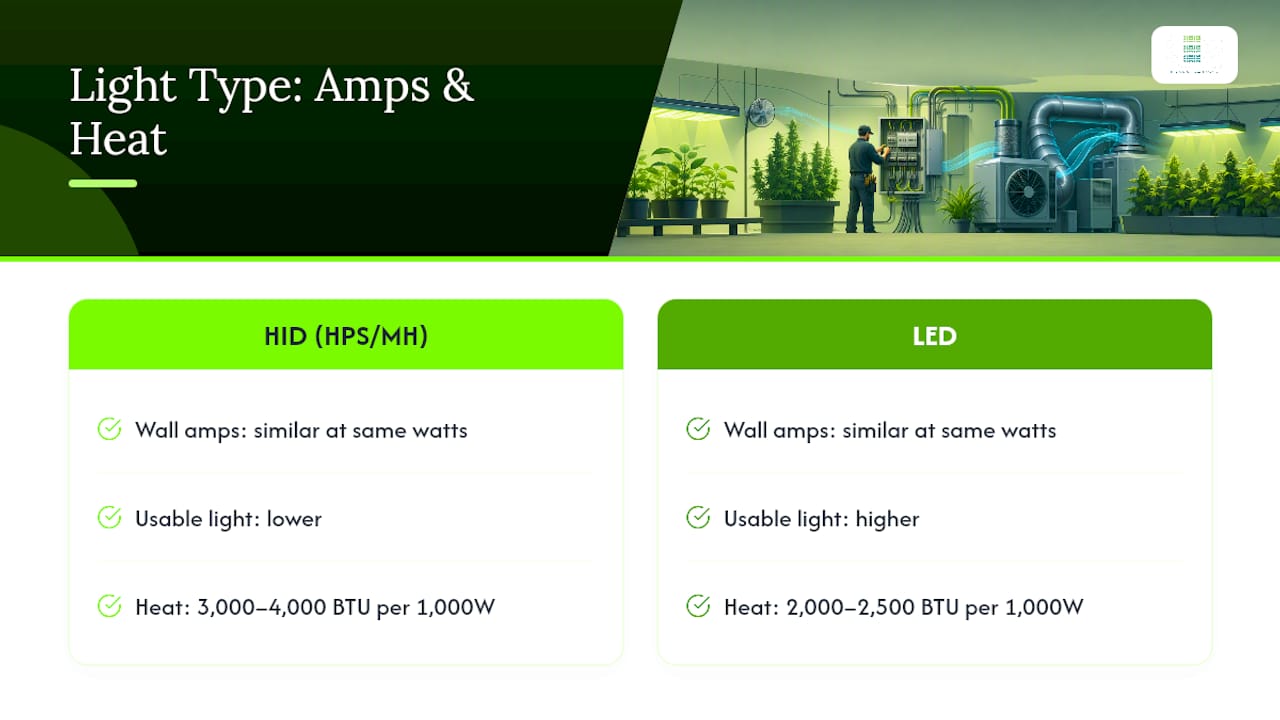
That efficiency gap matters more once you factor in heat. HID fixtures push 3,000 to 4,000 BTU per 1,000W into the room, compared to 2,000 to 2,500 BTU per 1,000W for LEDs. That extra heat becomes extra HVAC amps on top of the lighting circuit, often adding several more amps of cooling draw for equivalent canopy coverage.
The practical upshot: growers replacing an HID setup with LED fixtures at the same light intensity typically end up needing fewer total watts, which means fewer lighting amps and a smaller HVAC circuit to match. That’s the calculation worth running before assuming a straight watt-for-watt swap, since matching PPFD (light intensity at the canopy) rather than matching nameplate watts is what actually determines whether you can downsize.
Grow rooms run humid by design, and that moisture doesn’t stay confined to the canopy. Condensation forms on cool surfaces, including metal junction boxes, timers, and ballast housings, especially during lights-off periods when temperatures drop and humidity spikes.
Moisture near live electrical connections accelerates corrosion on contacts and connectors, which increases resistance over time. Increased resistance generates heat at that connection point, a slow-building hazard that can go unnoticed until a breaker starts tripping for no obvious reason. GFCI protection on every grow-room circuit is the primary defense here, since it cuts power fast when it detects current leaking through an unintended path, like a damp connection.
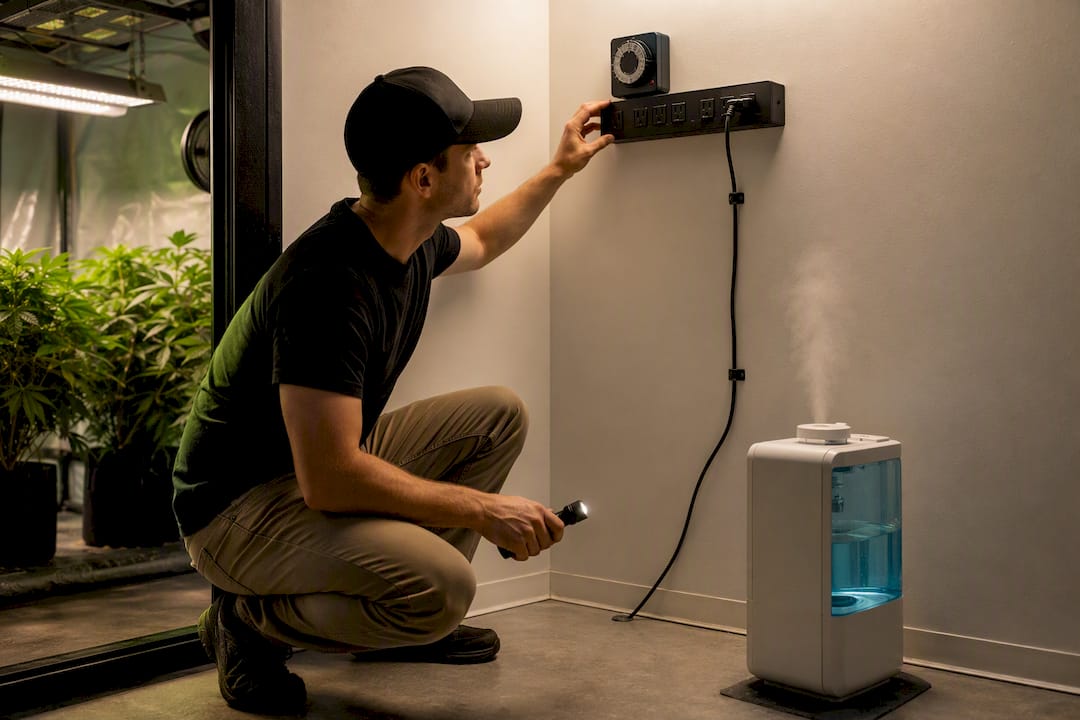
Beyond GFCI protection, keep outlets, power strips, and timers mounted above splash height and away from misting nozzles or humidifier outputs. Route cords so they don’t pool water at any low point, and inspect connections periodically for the white or greenish corrosion that signals moisture intrusion. None of this is complicated, but it’s the kind of maintenance that’s easy to skip until it causes a problem.
The most common mistake isn’t bad math, it’s incomplete math. Growers calculate lighting amps carefully, then forget HVAC entirely, or assume nameplate wattage without checking driver efficiency and power factor. Both errors push real-world draw higher than the plan accounts for.
The fixture side of that equation matters more than most growers realize. Under-canopy proximity lighting systems, like LedGrowLightsDepot’s approach, improve light distribution to lower canopy zones that top-only fixtures miss. That means growers often need less total top-mounted wattage to hit the same yield, which lowers both lighting amps and the HVAC amps needed to shed that light’s heat. Better distribution beats brute-force wattage almost every time.
— Scott
The fastest way to lower your grow room’s amp draw isn’t a bigger panel. It’s fewer watts doing more work. Every watt you don’t need for lighting is a watt your HVAC doesn’t need to remove, which means less lighting current and less cooling current stacked on the same circuit.

LedGrowLightsDepot’s ThinkGrow LED Model-I fits small-to-medium tents where efficiency per watt matters most, while the Grower’s Choice ROI-E720 covers larger 4×4 and 5×5 rooms without the amp penalty of an equivalent HID setup. For growers layering supplemental light lower in the canopy rather than adding another top fixture, the PROXIMITY Cube Lighting System improves distribution to lower bud sites without meaningfully raising total circuit draw. Run your fixture’s spec sheet against the formulas above, then browse the catalog to match your space and your panel’s actual capacity.
Run your own figures through the HydroBuilder grow room electricity calculator for cost and amp estimates, and review the Mike Holt newsletter on grow room HVAC electrical guidance for cooling-load context. Save your spec sheets and calculator output for your electrician.
0 of 3 items selected





Leave a comment