
Free Shipping in the USA on nearly all items!
Limited phone hours during the Holidays! Call us: 888-611-9305
Free Shipping in the USA on nearly ALL items! Limited phone hours during the Holidays!

A 4x4 tent (16 sq ft) needs roughly 480 to 800 true watts for flowering and 400 to 480 true watts for vegetative growth, based on the widely recommended 30 to 50 watts per square foot rule for flower and 25 to 30 for veg. That number refers to actual power draw, not marketing “equivalent” wattage. Everything else, fixture count, mounting height, PPFD, is about hitting that target evenly.
TL;DR:
- For flowering, a 4x4 tent requires approximately 480 to 800 true watts, depending on growth stage and technique, rather than marketing claims.
- Multiple fixtures distributing light evenly across the canopy improve coverage and yield compared to a single high-wattage fixture, especially in dense canopies.
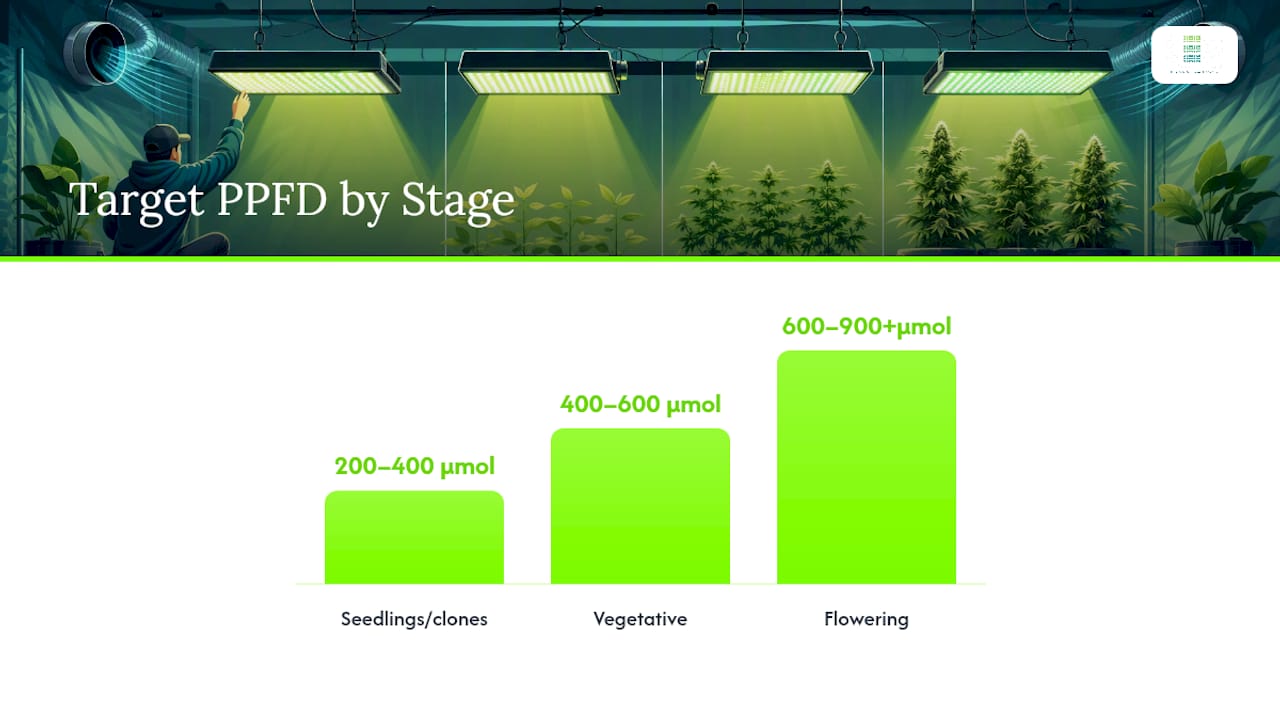
- PPFD measurements are more meaningful than wattage on the box, with optimal ranges varying from 600 to 900+ µmol/m²/s during flowering.
- Electrical considerations include calculating amperage, ensuring circuit safety, and planning for heat and ventilation based on actual power draw.
- Prioritize measuring PPFD at multiple canopy points before purchasing fixtures to match the actual light needs of your specific setup.
The 30 to 50 W/sqft flowering band and the 25 to 30 W/sqft veg band aren’t arbitrary. They come from years of grower data showing what canopy actually needs to push toward commercial-grade yield without wasting power on light the plant can’t use. For a 4x4 footprint, that math breaks down cleanly:
Most guides now settle on 400 to 600 true watts as a practical middle band for a 4x4 tent, especially for growers running a single tent year-round rather than chasing maximum yield every cycle. That’s a meaningful distinction from what you’ll see printed on a light’s box. A fixture advertised as “1,000W equivalent” might draw only 150 true watts from the wall, which will leave a 4x4 canopy badly underlit no matter how bright the marketing photos look. Manufacturers use equivalent wattage to compare against old HPS bulbs, but it tells you nothing about actual output. When you’re sizing a tent, true watt draw is the only number that matters, and it’s the number you should be comparing against the ranges above.
Figuring out watts for 4x4 spaces comes down to one simple equation: square footage × target watts per square foot = total true watts. Here’s how to run it.
This same calculation scales down for smaller tents, and LedGrowLightsDepot’s guide on LED wattage for tiny spaces walks through the math for footprints under 16 sq ft if you’re working with a partial tent or a mixed setup.
A single 600 to 750W-class fixture centered over a 4x4 tent will hit your total wattage target, but it tends to create a hot spot directly underneath and a falloff toward the corners. Two or three lower-wattage fixtures (250 to 420W each) spread across the canopy solve that unevenness because each one covers less ground and overlaps its neighbor’s edges.
The tradeoff is straightforward:
Mounting height changes by stage. Seedlings generally sit 24 to 36 inches below the light, veg stays around 18 to 24 inches, and flowering tightens to 12 to 18 inches depending on fixture intensity. Move fixtures in 2 to 4 inch increments and watch the top leaves for bleaching before settling on a final height.
Under-canopy or supplemental side lighting fills in the lower bud sites that overhead fixtures miss, which is where a lot of wasted potential yield actually lives. Reflective tent walls (the Mylar most tents ship with) also matter more than growers give them credit for.
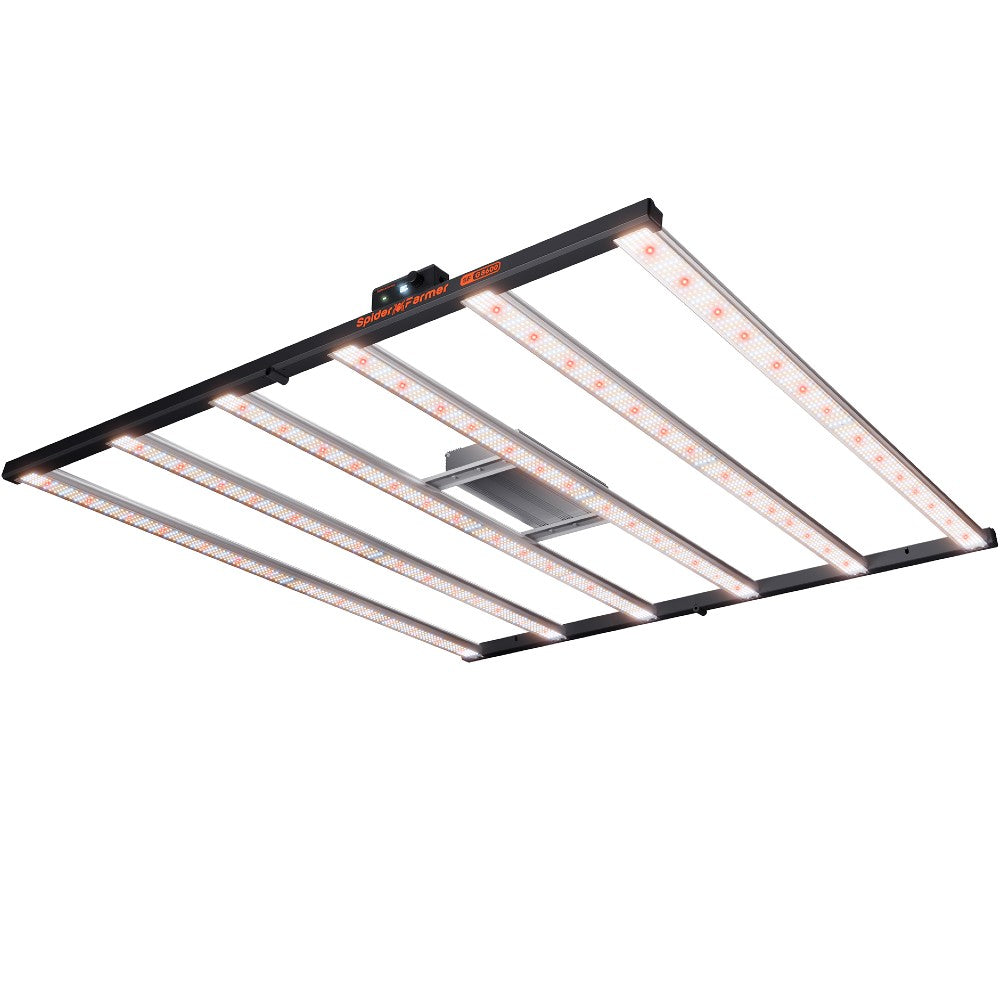
Pro Tip: If you’re running a single center fixture and seeing pale, thin growth at the corners, don’t add more wattage. Add a second smaller fixture or supplemental side lighting instead. The problem is usually distribution, not total power.
For growers running dense micro setups instead of full-canopy tents, the layout logic shifts. This guide to home micro-grow techniques covers when a compact multi-fixture layout beats one large light for smaller plant counts.
Two fixtures can draw the exact same true wattage and deliver completely different results at the canopy, because wattage measures power consumption, not light actually reaching the plant. Photosynthetic Photon Flux Density (PPFD) measures that delivered intensity, and it’s the number that should guide your final setup, not the watt figure on the spec sheet.
Target PPFD ranges by stage:
A more efficient diode array can hit the flowering PPFD target while drawing fewer true watts than an older or lower-quality fixture, which is why “PPFD per watt” is a better efficiency metric than watts alone. LedGrowLightsDepot’s breakdown of PPFD per watt explains how to compare fixtures on that basis rather than raw output.
Lowering a fixture increases PPFD at the canopy without changing wattage at all, and raising it does the reverse. That’s your primary tuning tool once the fixture is installed. A cheap PAR meter or quantum sensor lets you check actual PPFD at multiple canopy points rather than trusting a single number from the manufacturer’s chart, since real PPFD varies from center to edge in almost every tent. If you’re seeing PPFD readings above 1,000 µmol/m²/s during flower, raise the fixture a few inches or dim it; readings that high without supplemental CO2 tend to cause more stress than benefit.
Higher wattage means more current draw and more heat to manage, and both need to be planned before you flip the switch, not after.
Once you know your target wattage, picking actual fixtures is the easy part. Here’s how the ranges above translate into real setups using true watt specs rather than equivalent claims.
LedGrowLightsDepot’s proximity lighting systems are built around the under-canopy distribution problem specifically, and the company reports over 20% yield increases and improved bud grading when supplemental lighting fills the gaps a single overhead fixture leaves behind. That claim is backed by a 4.8 out of 5 rating across more than 5,800 customer reviews, which is a large enough sample to trust when comparing configurations.
Most wattage advice treats the watts-per-square-foot number as the finish line. It’s the starting line. Two growers can hit the exact same 640 true watts in a 4x4 tent and get meaningfully different results depending on how that power is distributed, how close the fixture sits to the canopy, and whether the lower bud sites get any light at all.
The bigger mistake I see is growers overspending on total wattage to compensate for bad coverage instead of fixing the coverage. A single 800W fixture centered over a tent with weak edges isn’t solving anything a second smaller fixture couldn’t solve for less total power. Watts-per-square-foot is a useful entry point, but PPFD at multiple canopy points is the number that should decide whether you add wattage, move a fixture, or leave things alone.
If you take one thing from this guide, prioritize measuring before buying. A cheap PAR meter will tell you more about what your 4x4 actually needs than any spec sheet.
— Scott
If you’ve landed on a target in the 480 to 800 true watt range for flowering, LedGrowLightsDepot carries the exact fixtures built to hit that number without relying on inflated equivalent-wattage claims. Every product page lists true watt draw and coverage footprint up front, so you’re comparing real numbers instead of marketing math.

For a straightforward single-fixture setup sized for a 4x4 flowering room, the Grower’s Choice ROI-FF 650W is built specifically for that footprint. If you’re planning a layered setup with supplemental under-canopy fill, browse the full LED grow light catalog to pair a main fixture with a Sunblaster or proximity lighting add-on. Orders ship with standard return protection, so sizing a fixture to your exact tent doesn’t mean guessing right on the first try.
0 of 3 items selected





Leave a comment