
Free Shipping in the USA on nearly all items!
Limited phone hours during the Holidays! Call us: 888-611-9305
Free Shipping in the USA on nearly ALL items! Limited phone hours during the Holidays!

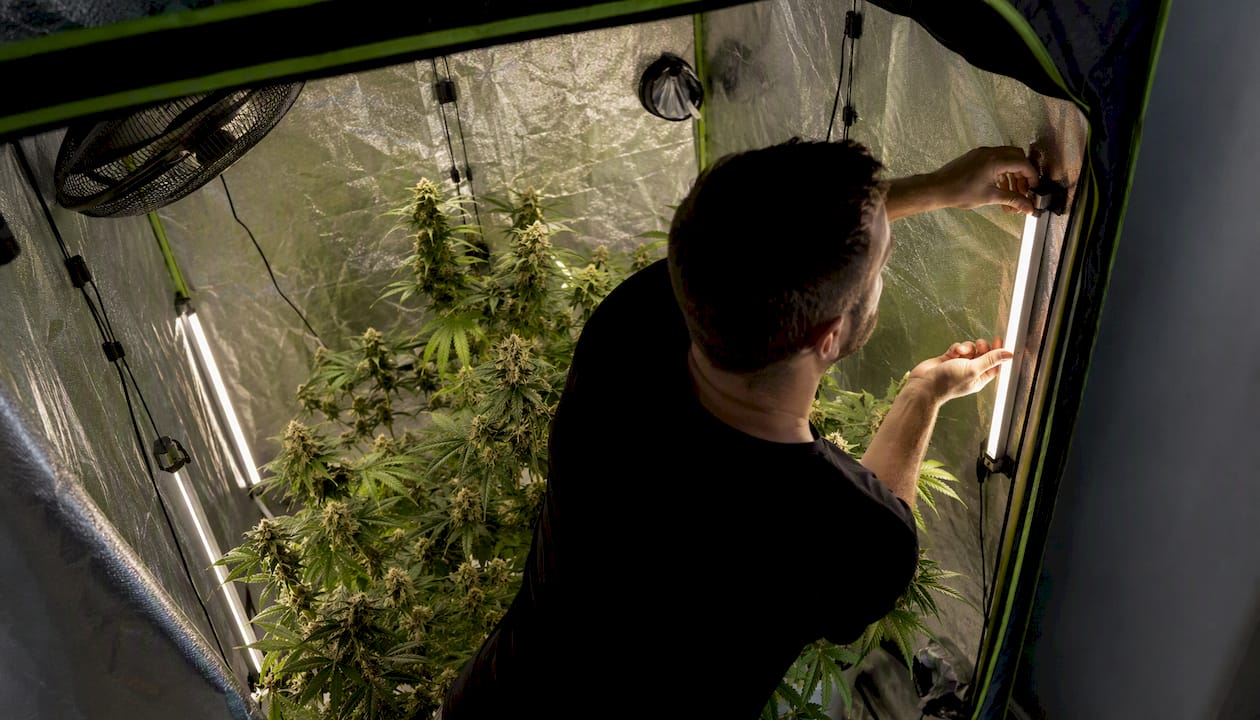
Yes, side lighting works in a grow tent. It fills the shaded lower canopy zones that overhead fixtures can’t reach, converting marginal bud sites into usable yield. The two factors that determine whether it pays off are canopy density (sparse, single-plant grows benefit less) and how carefully you tune intensity and schedule to complement your top light.
Side lighting in a grow tent is most beneficial when canopy density causes light deficits at mid-canopy, and using a PAR meter to tune placement is the reliable method to confirm effectiveness.
| Point | Details |
|---|---|
| Measure before buying | Take a mid-canopy PAR reading first; below 150 µmol/m²/s confirms side lighting will help. |
| Match fixture to tent size | Two bars suit a 2×2; six to eight bars or two slim panels suit a dense 4×4. |
| Target 200–400 µmol/m²/s | That PPFD range at lower bud sites during flower converts shaded nodes into usable yield. |
| Seal all cable pass-throughs | Light leaks from side-light wiring are the top photoperiod disruption risk in tent grows. |
| LedGrowLightsDepot proximity systems | Purpose-built under-canopy fixtures designed to raise lower-node PPFD without adding top-canopy heat stress. |
Side lighting refers to fixtures mounted on the tent walls, poles, or under the canopy, aimed horizontally or upward into the plant’s mid and lower zones. It differs from top lighting, which is the primary overhead fixture driving canopy photosynthesis, and from general supplemental lighting, which raises the whole room’s DLI without targeting specific shaded zones.
The terms “side lighting” and “under-canopy lighting” are often used interchangeably, but there is a practical difference. Side lights mount vertically on tent walls and aim inward at mid-canopy. Under-canopy lights mount below the main canopy and aim upward at lower bud sites. Both serve the same purpose: delivering usable PPFD to lower nodes that top lights can’t penetrate through dense foliage.
Side lighting and under-canopy lighting solve the same problem from different angles: they put photons where overhead fixtures physically cannot reach, turning shaded lower nodes into productive bud sites rather than wasted plant mass.
| Feature | Top lighting | Side / under-canopy lighting |
|---|---|---|
| Primary role | Drive canopy photosynthesis | Fill shaded lower and mid zones |
| Mounting position | Overhead, centered | Tent walls, poles, or below canopy |
| Typical wattage | 200–650W per tent | 20–100W total supplemental |
| Heat impact | Concentrated above canopy | Distributed at plant level |
| Photoperiod risk | Low (overhead, sealed) | Higher if cable pass-throughs leak |
The clearest gain is lower-bud density. Without side lighting, nodes below the top third of a dense canopy receive PPFD well below the 200–400 µmol/m²/s range that supports meaningful bud development. Community grow journals consistently show that growers who add targeted side bars report noticeably denser lower buds and more uniform ripening across the whole plant.
Three benefits stand out:
The yield uplift from side lighting depends more on canopy density and node viability than on raw wattage. Targeted PPFD at bud sites matters more than simply running more watts overhead, which is why a 30W side bar can outperform adding another 100W top light when the problem is shading, not total DLI.
The right time to add side lights is when your canopy is dense enough to shade its own lower nodes. That typically means late vegetative stage or the first week of flower, before lower bud sites are committed to their development trajectory.
Pro Tip: Install side lights before the canopy closes, not after. Once the top canopy is fully sealed, mounting hardware inside the tent becomes awkward and you risk damaging branches.
Four fixture types are practical for tent side lighting, each with different tradeoffs.
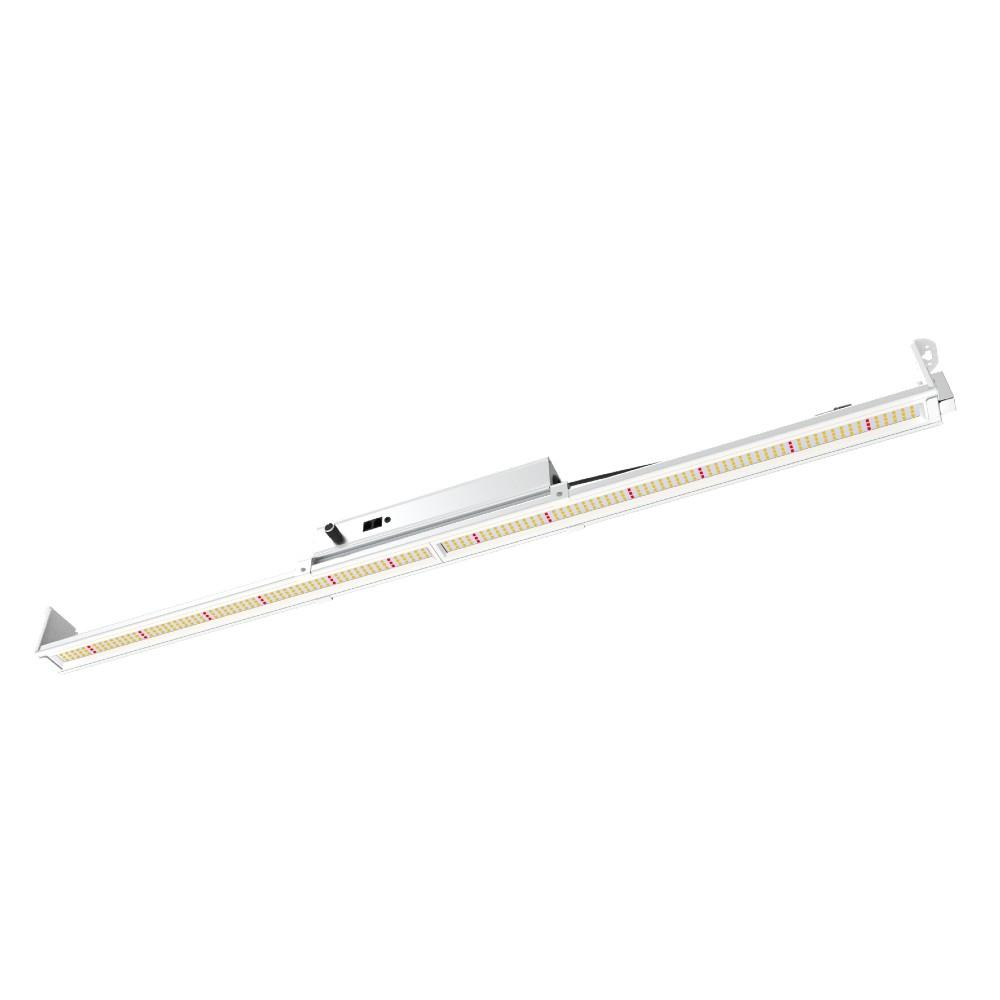
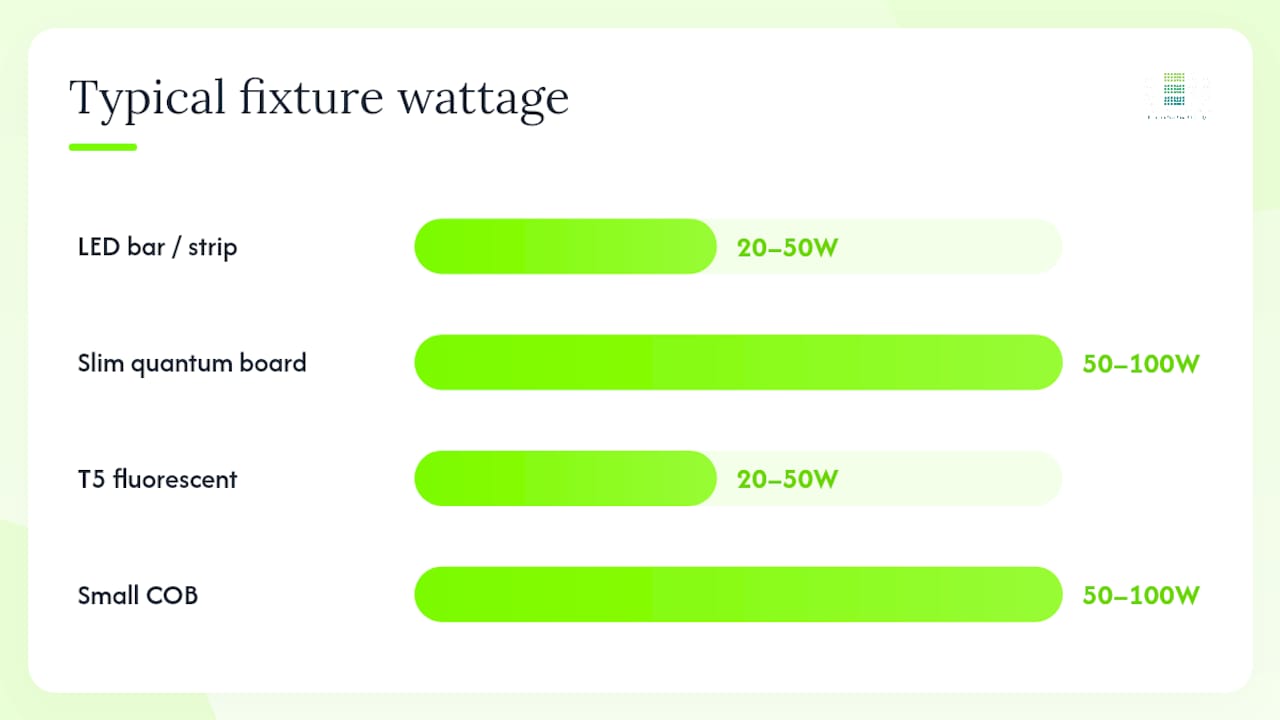
LED bars and strip lights are the most popular choice. They run cool, mount flat against tent walls or poles, and draw 20–50W per bar. Full-spectrum bars with efficacy ratings above 2.0 µmol/J deliver meaningful PPFD without adding significant heat. Their slim profile makes them easy to position close to the canopy without blocking airflow.
Slim quantum boards and mini-panels deliver higher output per fixture, typically 50–100W, and suit larger tents where a single bar per wall isn’t enough. They run warmer than bars and require more careful positioning to avoid hotspots.
T5 fluorescent strips are inexpensive and produce very little heat, but their lower efficacy (around 1.0–1.4 µmol/J) means you need more fixtures to hit the same PPFD. They work well in 2×2 or 2×4 tents where space and budget are tight.
Small COBs produce intense, focused light and suit growers who want high PPFD at a specific node cluster. The tradeoff is heat: a 50W COB at close range can raise local canopy temperature by several degrees.
Pro Tip: Look for IP54-rated bars for tent use. The rating confirms the fixture can handle the humidity levels common in a sealed tent without risking electrical failure.
| Fixture type | Typical wattage | Heat output | Mounting ease | Dimmable | Best for |
|---|---|---|---|---|---|
| LED bar / strip | 20–50W | Low | High | Usually yes | Most tent sizes |
| Slim quantum board | 50–100W | Medium | Medium | Yes | 3×3 and 4×4 tents |
| T5 fluorescent | 20–50W | Very low | High | Rarely | Budget 2×2 grows |
| Small COB | 50–100W | Medium-high | Medium | Sometimes | Targeted node lighting |
Placement depends on tent footprint, plant count, and how dense the canopy is. These layouts are practical starting points, not rigid rules.
Distance and angle guidelines:
PPFD targets for lower bud sites:
Safe mounting prevents fixture failures and reduces fire risk. Tent poles, wall grommets, and Velcro straps are the three most practical attachment points.
Electrical planning matters as much as mounting. Side lights add to your total circuit load, and daisy-chaining multiple fixtures on a single outlet without checking amperage is a common cause of tripped breakers or worse.
Spectrum choice for side lights follows the same logic as top lights, with one practical difference: side lights are closer to the plant and often run at lower intensity, so getting the spectrum right matters more than maximizing raw output.
Dimming guidance:
Smart controllers that integrate dimming across top and side lights simplify balancing intensity across veg and flower cycles and reduce the risk of overexposure at close distances.
Pro Tip: Check your LED spectrum options before buying side lights. A red-heavy side bar paired with a red-heavy top light creates a spectrum imbalance that can affect plant morphology during veg.
A PAR meter and a simple grid map are all you need to validate coverage and tune placement. This measurement workflow is the most reliable way to confirm your side lights are actually doing what you expect.
PPFD to DLI conversion: Multiply your average PPFD (µmol/m²/s) by your photoperiod in seconds, then divide by 1,000,000. A 12-hour photoperiod at 300 µmol/m²/s delivers a DLI of approximately 12.96 mol/m²/day at that measurement point.
Even a 30W LED bar raises local air temperature slightly, and in a sealed tent that heat accumulates. Monitor canopy temperature at the side-light level, not just at the top canopy, using a digital thermometer or infrared gun.
Light leaks are a more serious risk with side lighting than with top lights. Cable pass-throughs on tent walls are the most common leak point.
Pro Tip: For photoperiod grows, do the dark test after installing side lights, not before. A new cable pass-through can create a pinhole leak that’s invisible until you’re looking for it.
Most problems with side lighting come down to three categories: too much light too close, poor mounting, and ignoring airflow.
Common mistakes:
Diagnostics checklist:
When to scale back: if lower bud sites show persistent bleaching, foxtailing, or heat stress after adjusting placement, reduce side-light intensity to 30–40% or remove one fixture entirely. More light is not always better at close range.
LedGrowLightsDepot’s proximity and under-canopy systems are designed specifically to address the shading problem in dense tent grows. The brand reports over 20% yield increases from its proximity lighting approach, attributed to improved PPFD distribution at lower bud sites rather than increased total wattage.
The LedGrowLightsDepot tent selection guide documents wattage rules of thumb for small spaces and positions under-canopy fixtures as practical upgrades when overhead-only lighting leaves lower nodes underlit. Community grow-journal testing with modern 300–600W LEDs confirms that careful fixture selection and canopy training can produce significant harvests in 4×4 tents, with PAR maps showing measurable variation between top-only and top-plus-side configurations.
| Measurement scenario | Lower-node PPFD (typical) | Mid-canopy PPFD (typical) |
|---|---|---|
| Top light only (dense canopy) | 50–150 µmol/m²/s | 150–300 µmol/m²/s |
| Top + side lights added | 200–400 µmol/m²/s | 300–500 µmol/m²/s |
LedGrowLightsDepot’s proximity system data shows that under-canopy placement, not just increased overhead wattage, is the most direct way to raise lower-node PPFD in a dense tent without adding heat stress at the top canopy.
These figures reflect typical measured deltas in dense 4×4 tent configurations. Results vary by canopy density, training method, and fixture placement.
Off-the-shelf LED bar kits designed for tent side lighting typically run $40–$150 for a 4-bar set covering a 3×3 or 4×4 tent. Full-spectrum bars with IP54 ratings and dimming capability sit at the higher end of that range. The Sunblaster Micro LED is one compact option for smaller tents and shelf grows where a single supplemental bar is enough.
DIY builds using LED strip lights on aluminum channels cost less upfront, typically $20–$60 in materials, but require soldering, heat management, and driver selection. The time investment is real, and a poorly built strip light with inadequate heat sinking degrades faster than a purpose-built bar. For most home growers, an off-the-shelf bar kit with a warranty is the better value.
A practical budget framework:
For growers who want a beginner’s framework for fixture selection, starting with one bar per wall and measuring before adding more is the lowest-risk approach.
Side lights work best when they complement your top light, not compete with it. The goal is a balanced DLI across all canopy zones, not maximum output at any single point.
Start by establishing your top-light baseline. If your overhead fixture is a Grower’s Choice ROI-E720 or similar high-output bar light, it likely delivers strong top-canopy PPFD but drops off sharply below the canopy. Side lights fill that gap without requiring you to raise the top light’s output.
Scheduling: run side lights on the same timer as your top light. Separate timers create unintended light-on or light-off periods that can stress photoperiod plants. If your top light has a sunrise/sunset dimming ramp, match the side-light schedule to the same window.
Intensity balance: during flower, aim for side-light output at roughly 30–50% of your top-light PPFD at the same canopy height. If your top light delivers 800 µmol/m²/s at the top canopy, target 250–400 µmol/m²/s from side lights at mid-canopy. A DLI control adapter can automate this balance across both fixture types.
A 2×2 tent with one plant trained to a flat canopy may not need side lighting at all. A 4×4 tent running eight plants in a SOG configuration almost certainly does. The relationship between tent size, plant density, and side-light ROI is direct.
Larger tents with more plants create denser canopies that block more light from reaching lower nodes. The more plants per square foot, the more shading occurs, and the greater the PPFD deficit at lower bud sites. Side lighting’s return on investment scales with canopy density, not tent size alone.
Plant training also affects how much side lighting you need. Techniques like SCROG (screen of green) spread the canopy horizontally and reduce the vertical shading that side lights address. A well-executed SCROG in a 4×4 tent may need only minimal side supplementation. A tall, untrained plant with a dense top canopy benefits significantly more.
For very small tents (2×2 and smaller), one or two slim bars are usually sufficient. Scaling up to a 4×4 with high plant density may require six to eight bars to achieve consistent mid-canopy PPFD across the full footprint.
Side lights in a tent accumulate dust, resin particles, and mineral deposits from irrigation splash. A dirty lens or diffuser can reduce light output by a measurable amount over a grow cycle.
IP54-rated fixtures handle humidity better than unrated ones, but no fixture is maintenance-free. A 5-minute inspection and wipe-down at the start of each cycle extends fixture life and keeps output consistent.
Most growers who add side lighting expect a dramatic yield jump. The reality is more nuanced, and that nuance is worth stating plainly.
Side lighting’s biggest return comes from canopy uniformity, not raw yield numbers. When lower bud sites ripen at the same rate as top colas, harvest quality improves across the whole plant. Bud grading improves. Trim time drops. The “popcorn” problem shrinks. These are real, measurable gains, but they show up in bud quality and consistency more than in a simple gram-per-watt calculation.
The growers who see the clearest ROI from side lighting are running dense canopies in 3×3 or 4×4 tents with multiple plants. Single-plant grows with aggressive defoliation and a flat SCROG canopy often see minimal improvement because the shading problem is already solved by training. Adding side lights to a sparse canopy is adding cost without a proportional return.
One recommendation worth implementing immediately: before buying any side-light hardware, take a PAR reading at mid-canopy with your current top light running. If the reading is above 300 µmol/m²/s, your canopy may not need supplemental side lighting yet. If it’s below 150 µmol/m²/s, side lights will almost certainly pay off.
LedGrowLightsDepot’s proximity and under-canopy systems are built specifically for the shading problem that overhead-only setups create in dense tents. The brand’s 4.8/5 rating across more than 5,800 reviews reflects consistent results from home growers and commercial cultivators who’ve added supplemental lighting to existing tent setups.
For growers ready to add side lighting, the ThinkGrow LED Model-I is a compact, tent-compatible fixture that works as both a primary top light and a supplemental source in smaller spaces. Growers running larger 4×4 tents can pair a Grower’s Choice ROI-E420 as a primary overhead with slim side bars for full-canopy coverage. The Grower’s Choice ROI-FF 650W is purpose-built for 4×4 flowering and pairs well with under-canopy supplemental bars when canopy density demands it. Browse the full selection at LedGrowLightsDepot to find the right fit for your tent size and plant count.
0 of 3 items selected





Leave a comment