
Free Shipping in the USA on nearly all items!
Limited phone hours during the Holidays! Call us: 888-611-9305
Free Shipping in the USA on nearly ALL items! Limited phone hours during the Holidays!

The best light for orchids indoors is a high-output, full-spectrum LED hung 6 to 12 inches above the leaves and run for 12 to 16 hours a day. Match the intensity to the orchid type. Low-light orchids such as Phalaenopsis need less than Cattleya or Vanda. Choose a fixture by PPFD at a stated distance, not by lumens or wattage.
This guide covers the targets, the specs, the setup and the signs that tell you to adjust.
Orchids grow in a wide range of habitats, so one number does not fit every plant. Three things matter indoors:
Iowa State University Extension describes the target as bright, indirect light. Many homes cannot provide it all year, especially in winter or in rooms facing north. A grow light fills that gap.
Of the three, intensity is the one most setups get wrong. The AOS says that for many orchids ideal light quality is less critical as long as the quantity of light is strong. Start by getting the intensity right, then look at spectrum.
Orchids fall into rough groups by how much light they tolerate and need. The New York Botanical Garden lists low-light Phalaenopsis and Paphiopedilum doing well at about 1,000 foot-candles. High-light Vanda and Cattleya need 2,000 to 3,000 foot-candles.
Erik Runkle of Michigan State University gives suggested maximum intensities in his 2008 article for the AOS:
| Orchid group | Suggested maximum (foot-candles) |
|---|---|
| Phalaenopsis, Paphiopedilum | 1,500 |
| Miltoniopsis, Zygopetalum | 2,500 |
| Cattleya | 3,000 |
| Brassia, Cymbidium, Degarmoara, Dendrobium, Oncidium | 5,000 |
These are ceilings, not targets. Start lower and work up, especially with a new light.
Foot-candles measure brightness as the human eye sees it. Grow light makers state output in PPFD (photosynthetic photon flux density), measured in micromoles per square meter per second. The two units are not interchangeable. Our notes on PPFD versus lux explain the difference in more detail.

A product page can list many numbers. These are the ones that help you choose for orchids.
PPFD tells you how much light reaches the leaves. A figure only means something with a distance attached. The AOS suggests 500 to 650 PPFD or more at 18 inches, or 850 to 1,100 PPFD at 12 inches, for indoor orchids.
Look for a PPFD map or chart on the product page. It should show readings at several heights and across the footprint.
Lumens measure brightness for human eyes. They say little about the light plants use. If you buy a bulb-style light, the AOS advises choosing one with more than 1,600 lumens and a CRI of 95 or higher. CRI is the Color Rendering Index, a measure of how natural colors look under the light.
For a dedicated grow fixture, use PPFD first and treat lumens as secondary.
The AOS advises a spectrum that mimics the color of sunlight for the best blooming. A full-spectrum white LED does this. The traditional fluorescent setup follows the same logic. The New York Botanical Garden describes a minimal system as four 48-inch fluorescent tubes: two warm (red) and two cool (blue), or four special plant-growing tubes that contain both.
For a closer look at how light color and intensity work together for tropical plants, see these spectrum and intensity recommendations from a tropical vivarium guide.

Check the footprint. A fixture that is bright in the center and weak at the edges leaves some plants short of light. Compare the fixture size with your shelf or tent. A bar or panel that spans the whole shelf gives more even results than one point source.
LED fixtures run cooler than many older light types, which helps in a small space. Look for a built-in or plug-in timer and, where available, dimming. Dimming lets you start low and raise intensity as the plants adapt.
Place the light 6 to 12 inches above the foliage. The AOS Phalaenopsis culture sheet gives this range, and Iowa State University Extension gives the same one. The right height inside that range depends on the fixture’s output and the orchid type.
A simple way to begin:
The AOS suggests 12 to 16 hours a day to mimic a natural photoperiod. Iowa State University Extension advises at least 14 hours of daily lighting for orchids that rely on artificial light.
A plug-in timer keeps this consistent. Runkle recommends a dark period of at least six hours each day, because continuous lighting can cause undesirable responses in some species.
Runkle also notes that orchids can sense very low light levels. Light from an adjacent room at night can disrupt the short-day requirements of certain species. If your orchids need a cool, dark period to set flower spikes, keep hallway lights and screens away from the shelf at night.
The plant tells you whether the setup works. The AOS lists the main signs: too little light can prevent flowering and produce thin, narrow leaves and weak growth. Too much light can scorch leaves and cause brown spots.
| What you see | Likely cause | Adjustment |
|---|---|---|
| Dark green, soft, narrow leaves | Too little light | Lower the light or add hours |
| No flower spikes on a mature plant | Too little light | Increase intensity gradually |
| Brown or bleached patches | Too much light | Raise the light or dim it |
| Reddish or yellowish leaves | Light may be near the upper limit | Raise the light a few inches |
The Illinois Orchid Society suggests a quick check. Hold your hand one foot above the foliage. A shadow with blurred edges suggests the light is about right. If you see no shadow at all, the light is too low.
Change one thing at a time, and give the plant a few weeks. Orchids respond slowly, so judge by new growth, not by a single day.
Light and temperature drop in winter. The University of Maryland Extension advises skipping fertilizer in winter because of cooler temperatures and lower light intensity. A grow light on a steady schedule keeps the light side of the equation stable through those months.
Most orchid growers work with a shelf, a window ledge or a small tent. These steps keep the layout simple.
Runkle notes that shade cloth and retractable shade curtains are the usual professional tools for managing intensity and preventing leaf scorch in greenhouses. At home, the equivalents are raising the fixture, dimming it or moving a plant farther from the center.
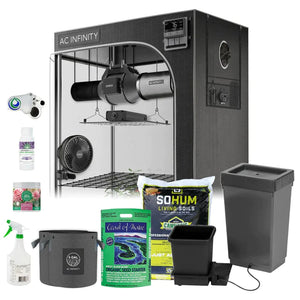
A tent keeps light, humidity and temperature in one controlled space. It suits growers with several plants or a spare corner. Tents come with reflective interior walls, which help spread light across the plants. Add a clip-on fan and a small humidity monitor.
We build our lighting range around one idea: light has to reach the plant where it grows. Distribution matters as much as raw output.
For orchids, that means choosing a fixture by PPFD at a real distance, matching it to the plant group, and keeping the footprint even across the shelf. Our grow lights, tents and environmental controls are sold so a grower can build the whole setup in one place: the light, the space and the climate gear around it.
Our customers range from first-time hobbyists to commercial growers. For small spaces, we point people to efficient top-lighting fixtures with clear specs, so the numbers on the page can be compared with the targets from the AOS and university extensions.
Scott
Use this short checklist before you buy:
A mixed collection is the common case. Choose a fixture that can reach the high end of the range for Cattleya and Vanda, then use distance and dimming to keep Phalaenopsis comfortable. It is easier to lower output on a strong light than to add output to a weak one.
We carry LED grow lights, grow tents and kits, and environmental controls for indoor gardens. For shelf and tent setups, start with our top lighting collection. It lists full-spectrum fixtures with specs you can compare against the AOS targets above. Our site also offers expert advice if you want help matching a fixture to your space.

If you also need a tent, fans or controls, you can browse the full range on the LED Grow Lights Depot homepage. Most US orders ship free.
A high-output, full-spectrum LED that delivers 500 to 650 PPFD at 18 inches, or 850 to 1,100 PPFD at 12 inches, matches the AOS guidance. Hang it 6 to 12 inches above the foliage. Adjust for the orchid type.
A household bulb can work as a supplement if it is bright enough. The AOS advises bulbs with more than 1,600 lumens and a CRI of 95 or higher. A dedicated grow fixture with a published PPFD is easier to match to a target.
Between 12 and 16 hours is the usual range, and Iowa State University Extension advises at least 14 hours when the plants rely on artificial light. Keep a dark period of at least 6 hours. A timer makes this easy.
Brown or bleached spots on the leaves point to too much light. Raise the fixture a few inches or dim it. Check again after a couple of weeks.
0 of 3 items selected


Leave a comment