Free Shipping in the USA on nearly all items!
Limited phone hours during the Holidays! Call us: 888-611-9305
Free Shipping in the USA on nearly ALL items! Limited phone hours during the Holidays!

The correct grow light hanging height is defined by one metric: photosynthetic photon flux density, or PPFD, delivered evenly across your plant canopy. Knowing how far to hang your grow light is not about picking a number from a chart. It is about matching light intensity to your plant’s current growth stage, your fixture’s output, and your canopy’s actual dimensions. This guide gives you the exact framework to do that, whether you are running a single quantum board over a 2x4 tent or a multi-fixture bar array across a commercial rack.
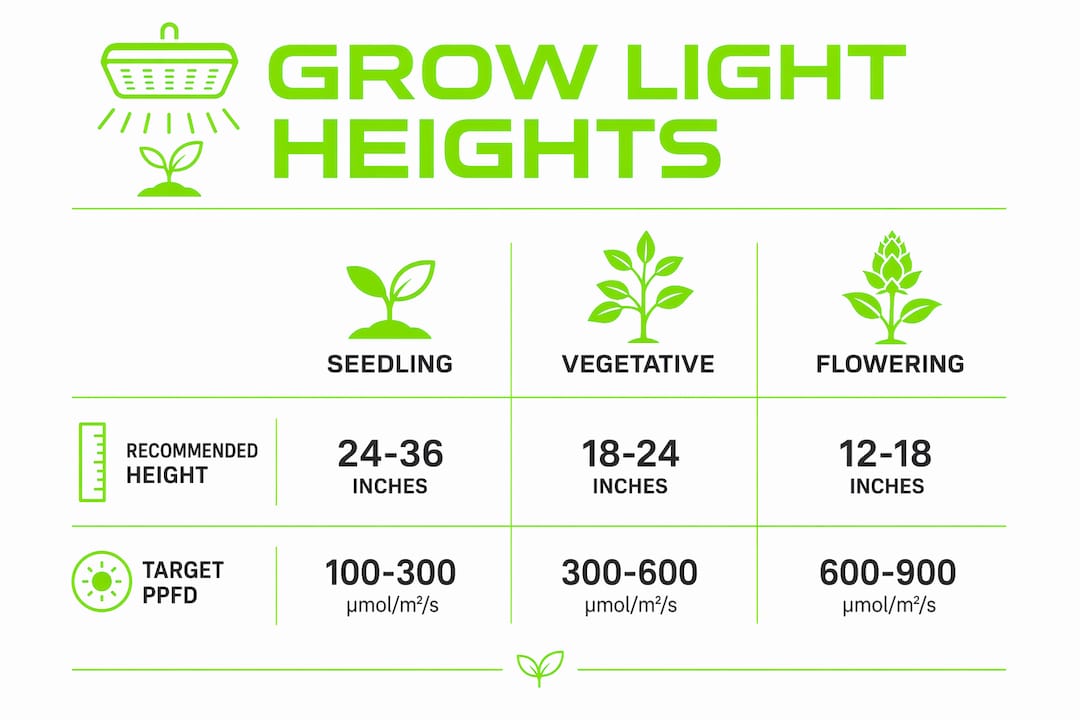
Recommended LED hanging distances vary directly by plant stage: seedlings generally need 24–36 inches, vegetative growth 18–24 inches, and flowering 12–18 inches. These ranges assume a mid-range LED fixture running at full power. Lower wattage units can hang closer without burning leaves; high-output fixtures above 600W often need more distance even during flowering.
The table below gives you a practical starting framework. Treat these as starting points, not final answers.
| Growth Stage | Recommended Height | Target PPFD Range |
|---|---|---|
| Seedling | 24–36 inches | 100–300 µmol/m²/s |
| Vegetative | 18–24 inches | 400–600 µmol/m²/s |
| Flowering | 12–18 inches | 600–900 µmol/m²/s |
| Late Flower | 10–16 inches | 800–1,000 µmol/m²/s |
Fixture wattage changes everything here. A 220W LED at 24 inches delivers a very different PPFD than a 420W fixture at the same height. Always pull your manufacturer’s PPFD map before you hang anything. That map shows you the actual intensity at specific distances, not a generic estimate.
LED spectrum type also affects how you interpret these distances. Full-spectrum fixtures with deep red and far-red diodes drive faster canopy response at lower intensities, which can mean you hang them slightly higher than a blue-heavy veg fixture at the same wattage.
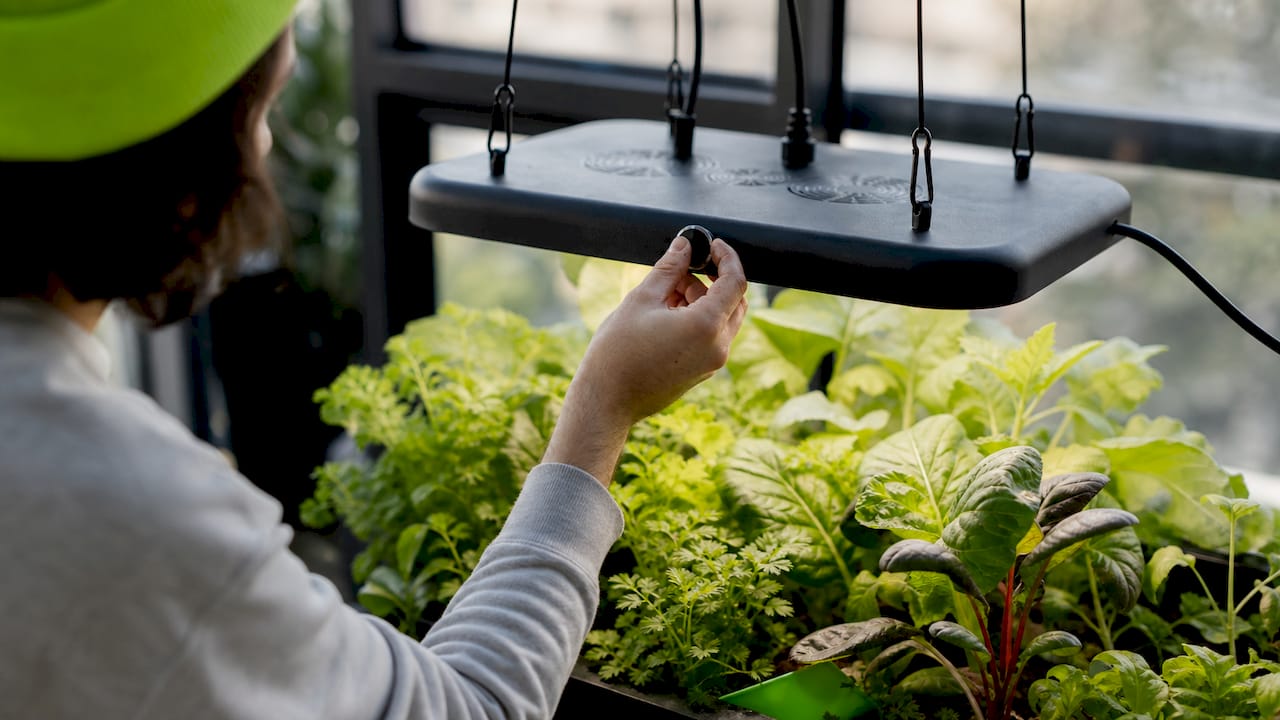
Pro Tip: If your seedlings are stretching tall and thin toward the light, your fixture is too far away. If leaf tips are curling upward or showing pale patches, it is too close. Both are fixable within 24 hours.
PPFD is the actionable metric to monitor when setting grow light height. A quantum sensor or PAR meter gives you a real number at canopy level, which is the only reading that matters. Visual guessing, even from experienced growers, misses intensity variations across the canopy by 20–40%.
Here is how to set up a proper measurement routine:
“There is no single perfect hanging height. Best practice is targeting PPFD and adjusting dimmer and height based on plant stage and fixture specifics.” — Fytech Systems PPFD Guide
Multi-fixture setups need PPFD uniformity measured across the entire canopy, not just under each light. Overlapping beam angles from bar arrays or quantum boards can create hotspots between fixtures or dark edges near tent walls. Measure the full grid before assuming your setup is dialed in.
For growers who want to go deeper, daily light integral combines PPFD with photoperiod length to give you a complete picture of total light energy your plants receive per day. Adjusting hanging height changes your PPFD; adjusting your light schedule changes your DLI. Both levers work together.
Pro Tip: A Apogee Instruments MQ-500 quantum sensor costs around $400 and pays for itself in one grow cycle by eliminating guesswork. If that is out of budget, many grow shops rent PAR meters by the week.
Light stress from incorrect hanging height is the most common cause of stunted growth in indoor gardens. Light too close causes bleaching or leaf curling; too far causes stretching and weak plant structure. Both problems look different but share the same root cause: the grower set a height once and never rechecked it as the plant grew.
The most common mistakes fall into predictable patterns:
Plant response to light changes is delayed. Rushing adjustments causes repeated errors because you are reacting to yesterday’s stress, not today’s conditions. Patience is the skill most growers underestimate.
LED fixture type directly affects optimal mounting height because beam angle and intensity distribution differ across COB, bar array, and quantum board designs. This is not a minor variable. It changes your starting height by 6–12 inches depending on the fixture.
| Fixture Type | Typical Beam Angle | Recommended Starting Height | Best For |
|---|---|---|---|
| COB (Chip-on-Board) | Narrow (60–90°) | 24–36 inches | Deep canopy penetration |
| Quantum Board | Wide (120°+) | 18–24 inches | Even canopy coverage |
| Bar Array | Very wide (150°+) | 12–20 inches | Multi-tier and vertical racks |
| Single-ended HPS-style LED | Medium (90–120°) | 20–30 inches | Traditional tent setups |
COB fixtures concentrate intensity in a narrow column. They need more height to spread light evenly across a 4x4 canopy. Hanging a COB at 16 inches creates a bright center and dim edges. Quantum boards like the HLG 250 Veg Pro spread light more evenly at lower heights, which is why they are popular for home growers with limited vertical space.
Bar arrays are the most forgiving for multi-tier setups. Their wide beam angle means you can hang them 12–16 inches above the canopy without creating hotspots, which is critical when vertical clearance is limited to 24 inches per tier.
Dimming and height adjustment are complementary controls, not alternatives. Use height to set your uniformity baseline. Use dimming to fine-tune intensity without disturbing your uniformity grid. A lighting controller like the Medic Grow GLC-1 lets you schedule dimming ramps across the photoperiod, which mimics natural sunrise and sunset cycles and reduces light stress during transitions.
The optimal grow light hanging height is the one that delivers your target PPFD uniformly across the canopy for each specific growth stage, adjusted by fixture type and measured with a quantum sensor.
| Point | Details |
|---|---|
| Stage-specific distances matter | Seedlings need 24–36 inches; vegetative 18–24 inches; flowering 12–18 inches from the canopy. |
| PPFD is the real target | Set height to hit your target PPFD range, not to match a generic distance number. |
| Measure the full canopy grid | Take nine PPFD readings across your canopy to catch hotspots and weak edges. |
| Adjust slowly and observe | Move lights 2–3 inches at a time and wait 48–72 hours before making further changes. |
| Fixture type changes everything | COBs need more height for uniformity; bar arrays can hang closer with even coverage. |
The most expensive mistake I see home growers make is treating hang height as a one-time setup decision. You hang the light, you walk away, and you come back three weeks later wondering why your plants look stressed. The light did not move. Your canopy did.
My honest recommendation: check your canopy-to-fixture distance every time you water. It takes ten seconds. As plants grow, that distance shrinks, and intensity at the canopy increases even though you never touched the light. A plant that was receiving 600 µmol/m²/s at week two might be receiving 900 µmol/m²/s at week five if you have not adjusted.
The second thing I tell every new grower: buy a PAR meter before you buy a second light. Most people do the opposite. They add more fixtures to solve a problem that is actually a height or dimming issue. One accurate PPFD reading tells you more than any visual inspection. You can learn more about LED grow light fundamentals to build the foundation that makes measurement meaningful.
I also think the industry undersells dimming as a tool. Most growers use their dimmer to reduce heat or save electricity. The smarter use is to keep your fixture at the ideal height for uniformity and use the dimmer to match intensity to your plant’s current stage. That combination gives you more control than height alone ever will.
— Scott
Getting your grow light height dialed in starts with having a fixture that gives you real control over both mounting position and output intensity. Ledgrowlightsdepot carries a full range of LED grow lights built for exactly this kind of precision work.
The NextLight 150h is a strong choice for home growers who want adjustable wattage and a wide, even beam angle that performs well at multiple heights. For growers managing larger spaces or multi-tier setups, the ION 720W delivers the output and mounting flexibility to cover serious canopy area. Ledgrowlightsdepot holds a 4.8 out of 5 rating from more than 5,800 verified customers. Browse the full LED grow lights catalog to find the right fixture for your space, stage, and yield goals.
The ideal distance for most LED grow lights during flowering is 12–18 inches above the canopy. Adjust based on your fixture’s PPFD map to hit 600–900 µmol/m²/s at canopy level.
Leaf bleaching, upward leaf curling, and pale or white patches on upper leaves are the primary signs your light is too close. Raise the fixture 3–4 inches and check the plant again after 48–72 hours.
Yes. Higher wattage fixtures produce more intensity at the same distance, so they generally need to hang higher to avoid light stress. Always use your manufacturer’s PPFD chart to set the correct starting height for your specific fixture.
Dimming and height adjustment work best together. Use height to set your canopy uniformity, then use dimming to fine-tune intensity for each growth stage without disrupting your coverage pattern.
Check your canopy-to-fixture distance every time you water and adjust whenever the gap drops below your target range for the current growth stage. Plants grow fast, and intensity increases as the canopy rises toward a stationary fixture.
{"one"=>"Select 2 or 3 items to compare", "other"=>"{{ count }} of 3 items selected"}

Leave a comment