
Free Shipping in the USA on nearly all items!
Limited phone hours during the Holidays! Call us: 888-611-9305
Free Shipping in the USA on nearly ALL items! Limited phone hours during the Holidays!

A commercial grow room lighting layout is a spatial and photometric engineering discipline that controls fixture position, quantity, height, and spacing to deliver uniform PPFD across the entire crop canopy. Get it wrong, and poor layout can reduce crop yield by 10–30%, waste 15–25% of your energy budget, and cause up to 20% uniformity loss within a single batch. Those numbers represent real revenue. A well-designed grow room lighting design closes that gap by matching every fixture decision to your canopy geometry, crop stage, and environmental controls.
A commercial grow room lighting layout defines where fixtures go, how many you need, how high they hang, and how far apart they sit. The industry term for this discipline is photometric layout planning, and it draws on three core metrics: PPFD (photosynthetic photon flux density, measured in µmol/m²/s), DLI (daily light integral, measured in mol/m²/day), and uniformity ratio. Each metric serves a different purpose. PPFD tells you instantaneous light intensity at canopy level. DLI tells you total light dose per day. Uniformity ratio tells you how evenly that dose spreads across your canopy.
Most growers know their target PPFD by crop type. Leafy greens typically target 150–250 µmol/m²/s, while cannabis in flower can require 800–1,000 µmol/m²/s or higher. What fewer growers calculate upfront is DLI, which determines whether your photoperiod and intensity combination actually delivers the biological dose your crop needs. A layout that hits peak PPFD in the center but drops 30% at the edges fails on uniformity, and that failure shows up as uneven growth, inconsistent grading, and reduced marketable yield.
Accurate canopy mapping is the first step in any efficient grow light arrangement. You map the productive canopy area, not the total room footprint. Aisles, equipment zones, HVAC units, and structural columns all consume floor space without producing crop. Designing for active canopy area rather than total room dimensions prevents you from overlighting non-crop spaces and wasting photons on concrete.
Start with these inputs before placing a single fixture:
Wall reflectance is underestimated by most commercial growers. Clean reflective surfaces significantly boost photon utilization, but their benefit depends on consistent cleaning procedures. A white wall that accumulates dust and residue over a grow cycle can drop reflectance enough to shift your uniformity ratio measurably.
Pro Tip: Use a quantum flux meter and a grid measurement protocol before finalizing your layout. Baseline readings from your existing space reveal hot zones, dead zones, and structural shadows that no software model predicts perfectly.
Lighting calculators help you estimate fixture count and spacing from your canopy dimensions and target PPFD. They are a starting point, not a final answer. Field measurement always overrides the model.
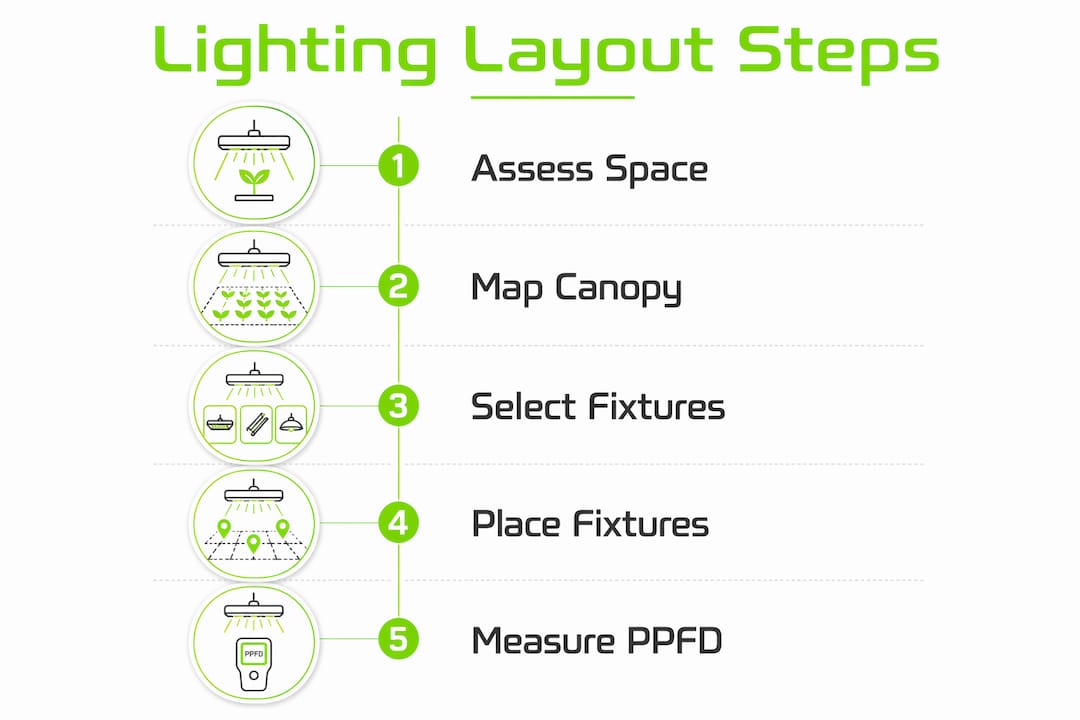
Fixture selection determines how much flexibility you have in placement. The three variables that matter most are efficacy (µmol/J), spectrum, and form factor. High-efficacy fixtures deliver more photons per watt, which directly reduces your energy cost per gram of yield. Spectrum affects crop morphology and quality, but for most commercial operations, a full-spectrum LED with a strong red-to-blue ratio covers the majority of crop types.
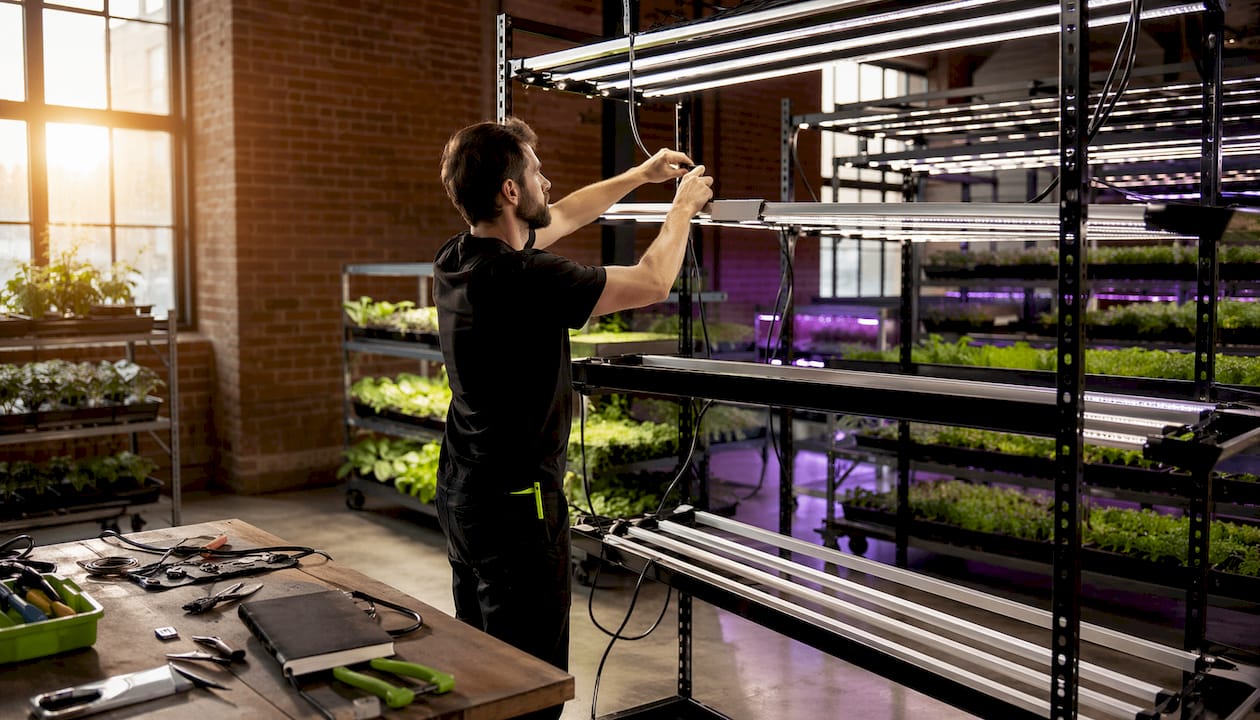
Form factor is where most commercial growers make their first layout mistake. Bar-style fixtures distribute photons over a wider linear area and tolerate closer spacing without creating hotspots. Bar fixtures are the preferred choice in large commercial rooms precisely because their elongated footprint produces smoother light fields than square panel fixtures at equivalent spacing. Panel fixtures concentrate output in a smaller footprint, which means you need more of them, spaced more carefully, to achieve the same uniformity.
| Feature | Bar fixtures | Panel fixtures |
|---|---|---|
| Light distribution | Wide, linear | Concentrated, circular |
| Spacing tolerance | Closer spacing without hotspots | Requires wider gaps to avoid hotspots |
| Best use case | Large commercial rooms, multi-tier racks | Smaller rooms, supplemental lighting |
| Uniformity at canopy | Higher with correct spacing | Lower unless carefully spaced |
| Mounting height sensitivity | Moderate | High |
Rack width directly determines how many fixture bars you need per tier. Narrow racks use a single bar, standard-width racks use dual bars, and wide racks require triple or quad bar configurations. Getting this wrong means one side of your canopy receives significantly less light than the center, which shows up as uneven plant development across the rack.
Centering fixtures over the canopy is non-negotiable. A fixture offset by even a few centimeters from the canopy centerline creates a light gradient that compounds across multiple tiers. In a 10-tier vertical farm, that small error at tier one becomes a measurable yield difference by harvest.
Pro Tip: For multi-tier systems, document fixture position relative to the rack centerline in millimeters, not just “centered.” Repeatable documentation makes commissioning faster and troubleshooting faster when something goes wrong.
Spacing is the single variable that most determines whether your layout succeeds or fails. Fixture spacing should be based on productive canopy area, not total room dimensions. Growers who calculate spacing from wall to wall routinely underlight the canopy center and overlight the aisles.
The core spacing principle is controlled overlap. A 10–20% overlap between adjacent fixture footprints eliminates dark zones between fixtures without creating hotspots. Smooth light fields require that overlap to be consistent across the entire canopy, not just in the center rows. The perimeter is where most layouts fail.
Mounting height is yield-critical in a way that surprises most growers. A 5 cm change in mounting height at typical multi-tier distances alters PPFD by 20–30%. That means a fixture installed 5 cm too high delivers roughly one-quarter less light to the canopy than your design specified. In a 1,000-square-foot room, that error across 40 fixtures represents a significant yield shortfall.
Edge loss mitigation requires deliberate fixture bias. The standard approach places the outermost fixture so its beam center falls at or slightly inside the canopy edge, not at the midpoint between the last plant row and the wall. For rooms with highly reflective white walls, you can afford slightly more distance because reflected photons contribute to edge coverage. For rooms with dark or painted walls, bias the perimeter fixtures inward more aggressively.
Pro Tip: Map your canopy in a 1-foot grid after installation and before the first grow cycle. Any point reading more than 15% above or below your target PPFD needs a fixture adjustment, not a dimming workaround.
Lighting and environmental controls are a coupled system. Vertical farms fail when lighting and climate control are designed independently. Every watt of light that enters your grow room becomes heat. That heat load must be removed by your HVAC system, and the airflow pattern that removes it must not create cold or hot spots at canopy level that interfere with transpiration.
Design your airflow paths before finalizing fixture positions. Fixtures mounted in rows create natural airflow channels between them. Use those channels deliberately by aligning supply and return air paths with fixture rows rather than across them. This keeps canopy temperature uniform and prevents the localized heat buildup that causes tip burn in leafy greens and foxtailing in cannabis.
Commissioning a commercial lighting setup follows a structured process:
Maintaining clean reflective surfaces is part of your standard operating procedure, not a one-time setup task. Dust, residue, and condensation on white walls and ceilings reduce photon recycling over time. Schedule surface cleaning on the same calendar as your nutrient and pH checks.
Most layout failures trace back to a small set of repeatable errors. Recognizing them early saves a full grow cycle.
A well-executed commercial grow room lighting layout requires mapping productive canopy area, selecting the right fixture form factor, applying controlled overlap spacing, and integrating lighting with environmental controls to deliver consistent, uniform PPFD at every growth stage.
| Point | Details |
|---|---|
| Map canopy area first | Design spacing from productive canopy footprint, not total room dimensions. |
| Bar fixtures outperform panels | Bar-style fixtures deliver wider, more uniform light fields in large commercial rooms. |
| Spacing drives yield | A 10–20% fixture footprint overlap eliminates dark zones and hotspots across the canopy. |
| Mounting height is critical | A 5 cm height error alters PPFD by 20–30%, directly affecting yield. |
| Integrate lighting and HVAC | Lighting and airflow must be designed together to maintain uniform canopy temperature. |
The most expensive mistake I see commercial growers make is treating lighting layout as a one-time decision. They invest in high-quality fixtures, run a solid initial commissioning, and then never touch the layout again. Two years later, they are troubleshooting uneven yields without realizing that three fixture replacements, a rack reconfiguration, and a new crop type have all quietly invalidated their original design.
The growers who consistently outperform their peers treat layout documentation the same way they treat nutrient records. Every change gets logged. Every commissioning measurement gets filed. When something goes wrong, they have a baseline to compare against. That discipline is not glamorous, but it is what separates a 15% yield improvement from a 30% one.
The other thing I have come to believe strongly is that energy efficiency and yield are not in tension. Growers sometimes resist reducing fixture count or adjusting spacing because they equate more light with more yield. The data does not support that. Overlighting wastes energy, raises canopy temperature, and can suppress yield in light-sensitive crops. The goal is the right amount of light, in the right place, at the right time. That is a layout problem, not a wattage problem. Growers who internalize that shift their thinking from “how many fixtures can I fit” to “what does my canopy actually need.” That shift is where the real gains live.
For growers looking at LED vs HPS performance data, the efficiency advantage of LED only materializes when the layout is correct. A well-spaced HPS room will outperform a poorly spaced LED room every time.
— Scott
Ledgrowlightsdepot carries commercial-grade LED fixtures, lighting controllers, and accessories built for the spacing and uniformity demands described in this guide. The ROI-E720 LED grow light delivers uniform canopy coverage at commercial scale, while the TrolMaster Hydro-X DLI adapter gives you precise DLI management and dimming control across every zone in your room. For growers who need full zoning capability, the Medic Grow GLC-1 lighting controller handles multi-zone scheduling and stage-specific dimming from a single interface.
Ledgrowlightsdepot’s product catalog covers everything from individual bar fixtures to complete control systems, backed by a 4.8 out of 5 rating from more than 5,800 verified growers. Their team can help you match fixture selection to your canopy dimensions and target PPFD before you commit to a layout.
Target PPFD depends on crop type and growth stage. Leafy greens typically require 150–250 µmol/m²/s, while cannabis in flower commonly targets 800–1,000 µmol/m²/s or higher.
Space fixtures so their footprints overlap by 10–20% across the productive canopy area. Measurements at canopy height should stay within 10–15% of your target PPFD; deviations beyond that signal a need for spacing or height adjustment.
A 5 cm change in mounting height at typical multi-tier distances alters PPFD by 20–30%. Even small installation errors compound across multiple tiers and significantly reduce canopy yield.
Start with a grid measurement across the canopy using a quantum meter. Identify points more than 15% above or below your target PPFD, then adjust fixture height, spacing, or dimming rather than applying a blanket dimming correction.
Yes. Seedlings and clones require far lower PPFD than plants in flower. Use a lighting controller with stage-specific dimming profiles to match canopy light levels to crop needs at each stage without repositioning fixtures.
0 of 3 items selected





Leave a comment