
Free Shipping in the USA on nearly all items!
Limited phone hours during the Holidays! Call us: 888-611-9305
Free Shipping in the USA on nearly ALL items! Limited phone hours during the Holidays!

CO2 supplementation works in a small grow tent, but only when your lighting and sealing already support it. If your tent leaks air at every zipper seam or your light intensity is average, adding CO2 gives you nothing but a higher electric bill. For most home growers, the smartest entry point isn’t a tank and regulator setup. It’s a passive CO2 bag or a low-maintenance passive generator, because these deliver measurable enrichment without asking you to manage solenoids or refill schedules.
The reason this works comes down to one relationship: plants only use extra CO2 when their photosynthetic machinery is already running near capacity. That happens when you’re hitting solid PPFD and DLI numbers under a light that reaches the lower canopy, combined with a tent that holds its atmosphere long enough for CO2 to build up during the light cycle.
CO2 supplementation raises yield only when strong canopy-wide light and a well-sealed tent already exist to make use of the extra carbon.
| Point | Details |
|---|---|
| Start with passive methods | A passive bag or bucket generator gives most small-tent growers measurable CO2 without equipment complexity. |
| Fix lighting before adding CO2 | CO2 only helps when canopy PPFD is already strong enough to be the limiting growth factor. |
| Target 1,000 to 1,200 ppm | This range delivers consistent results in vegetative and flowering stages without wasting gas. |
| Skip enrichment during seedling stage | Young plants lack the leaf area to use extra carbon, so hold off until true leaves establish. |
| Pair CO2 with LedGrowLightsDepot lighting | Proximity lighting systems improve under-canopy light capture, which increases what CO2 enrichment can actually deliver. |
Four approaches dominate the small-tent conversation, and each one trades off cost, precision, and effort differently. Here’s how they actually stack up once you get past the marketing copy.
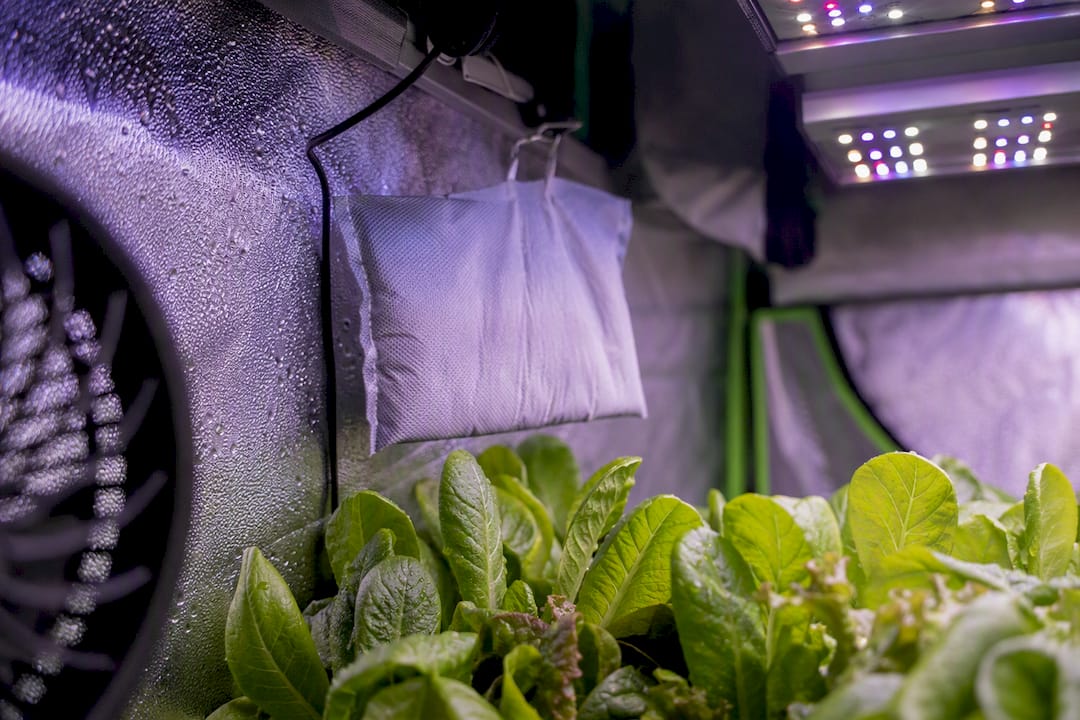
Passive bags and boxes are the low-friction option. You hang them, they generate CO2 through a slow chemical or fermentation reaction, and you forget about them until they’re spent. The tradeoff is precision. A natural CO2 generator box produces a burst of elevated CO2 for roughly 20 days once activated and is sized for tents around 1.2 x 1.2 meters, but you get no readout telling you whether you’re at 600 ppm or 1,400 ppm. You’re trusting the product, not measuring the result.
DIY fermentation (the sugar, water, and yeast bucket method) is the cheapest option on paper. It’s also the messiest. Output depends on temperature, sugar concentration, and yeast activity, so your CO2 curve spikes early and tapers unpredictably. Growers who try this report inconsistent yield results and occasional fruit-fly problems from the sugar solution left sitting in a warm tent.
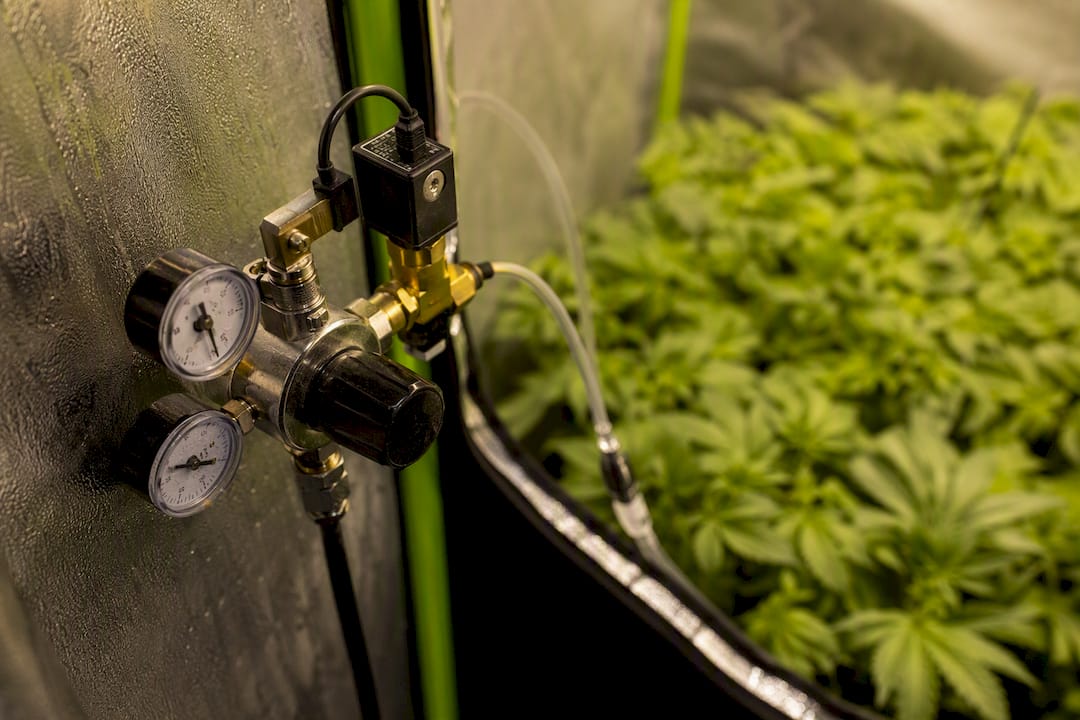
Compressed tanks with a regulator and solenoid give you the tightest control. Pair the tank with a controller and you can hold a stable ppm target within a narrow band. The catch is cost and complexity: you’re buying a regulator, a solenoid valve, tubing, and a controller, then learning to calibrate the whole chain. This setup shines when you’re running high-output lighting that can actually use the extra carbon, but it’s overbuilt for a casual 2x2 tent under modest light.
Burners combust propane or natural gas to produce CO2 continuously. They’re standard in commercial greenhouses with massive air volume and dedicated exhaust. In a sealed 4x4 tent, a burner adds heat load and combustion byproducts you have no good way to vent, which makes it the wrong tool for nearly every home setup.
Here’s the quick fit-check by goal:
Knowing which method fits your situation is one thing. Actually running it is another. Here’s what each looks like in practice.
Statistic to remember: a passive bucket-style generator can run continuously for up to six months in a very small tent footprint, which is longer than most single grow cycles from clone to harvest.
CO2 only helps when light isn’t your limiting factor. If your canopy is sitting at a modest PPFD and a middling DLI, plants are already CO2-saturated at ambient 400 ppm. Cranking enrichment to 1,200 ppm under weak light is like feeding a car premium gas while running on three cylinders. It does nothing measurable.
For CO2 to pay off, you generally need:
This is exactly why lighting quality matters as much as the CO2 method itself. A fixture that dumps light only on the top few inches of canopy wastes the CO2 you’re paying for, because the lower bud sites never see enough PPFD to use it. Better canopy light distribution means more of your plant is actually photosynthesizing hard enough to benefit from enrichment.
Pro Tip: Check your light’s PPFD map before buying any CO2 equipment. If your canopy edges are getting half the light of the center, fix that first. CO2 amplifies what your light already does; it doesn’t fix uneven coverage.
Getting this right the first time saves you from wasted product and false readings. Work through it in order.
Pro Tip: If your ppm reading spikes and crashes rapidly instead of holding steady, your tent isn’t sealing well enough. Fix that leak before you invest in more precise (and expensive) equipment.
Ambient outdoor air sits around 400 ppm. The enrichment range most product guides and growers cite runs from 800 to 1,500 ppm, with 1,000 to 1,200 ppm landing as the practical sweet spot for most small tents, according to dosing guidance from CO2 equipment suppliers.
Statistic to remember: the commonly cited enrichment band of 800 to 1,500 ppm gives you real room to work with, but overshooting past 1,500 ppm buys you no additional growth benefit, just wasted gas.
Budget expectations vary enormously by method, and that’s before you factor in ongoing consumables.
The ROI question comes down to your lighting. If your canopy is genuinely light-saturated and CO2 pushes a real yield increase, the tank route pays for itself faster. If your light output is average, you’re better off spending that same budget on a stronger fixture before touching CO2 equipment at all.
CO2 at typical enrichment levels (up to 1,500 ppm) isn’t toxic to people walking through the room briefly. The real danger shows up in enclosed spaces where CO2 concentrations climb far higher than any grow tent target, displacing oxygen enough to cause dizziness or worse. Never enter a sealed tent room without ventilating first if you’re running any compressed or burner-based system.
Pro Tip: Install a basic CO2 or air-quality alarm in the room housing your tent, not just inside the tent itself, if you’re running a compressed system. It’s a small cost against a real risk.
CO2 supplementation and lighting aren’t separate decisions. They’re the same decision viewed from two angles. A canopy that only receives strong light at the top wastes most of the CO2 you’re paying to add, because the lower bud sites are still light-limited regardless of how much carbon is available.
This is where under-canopy light distribution changes the math. A customer satisfaction rating of 4.8 out of 5 from more than 5,800 reviews backs that up with real usage volume, not just a spec sheet claim.
When more of a plant’s leaf surface is capturing usable photons instead of sitting in shade, CO2 enrichment has something to work with. Enrichment under uneven light is like adding fuel to an engine that’s only firing on half its cylinders.
For small-tent growers pairing CO2 with lighting upgrades, a compact fixture like the ThinkGrow LED Model-I or its higher-output sibling, the ThinkGrow LED Model-I Plus, gives you the canopy-wide intensity needed to justify enrichment in the first place. Growers scaling up should also look at micro grow tent light selection guidance to match wattage to tent footprint before adding CO2 to the mix.
No, and this is one of the most overlooked mistakes new growers make. Seedlings have minimal leaf surface area and a root system still establishing itself. Their photosynthetic demand is low, so pumping CO2 to 1,200 ppm around a two-week-old seedling does essentially nothing for growth and just wastes product.
The response curve to CO2 tracks leaf area and light interception directly. As a plant moves through vegetative growth and builds out a broader canopy, its capacity to use extra carbon increases. By the time a plant hits late vegetative growth and stacks into flowering, leaf area and light demand are both at their peak, which is exactly when enrichment delivers the most consistent, measurable benefit.
Flowering is often treated as the priority stage for CO2, and the reasoning holds: bud development is energy-intensive, and plants pulling more carbon during this window tend to show denser growth. But don’t assume the ppm target should climb further as flowering progresses. Many growers taper enrichment slightly in late flower, both because carbon demand can plateau and because dense, humid canopies at that stage benefit more from airflow than from tighter sealing.
Practical takeaway: hold off on enrichment through the seedling stage entirely, ramp it in gradually once true leaves establish and the plant is actively vegging, and treat flowering as your peak enrichment window rather than assuming more is always better as the plant matures.
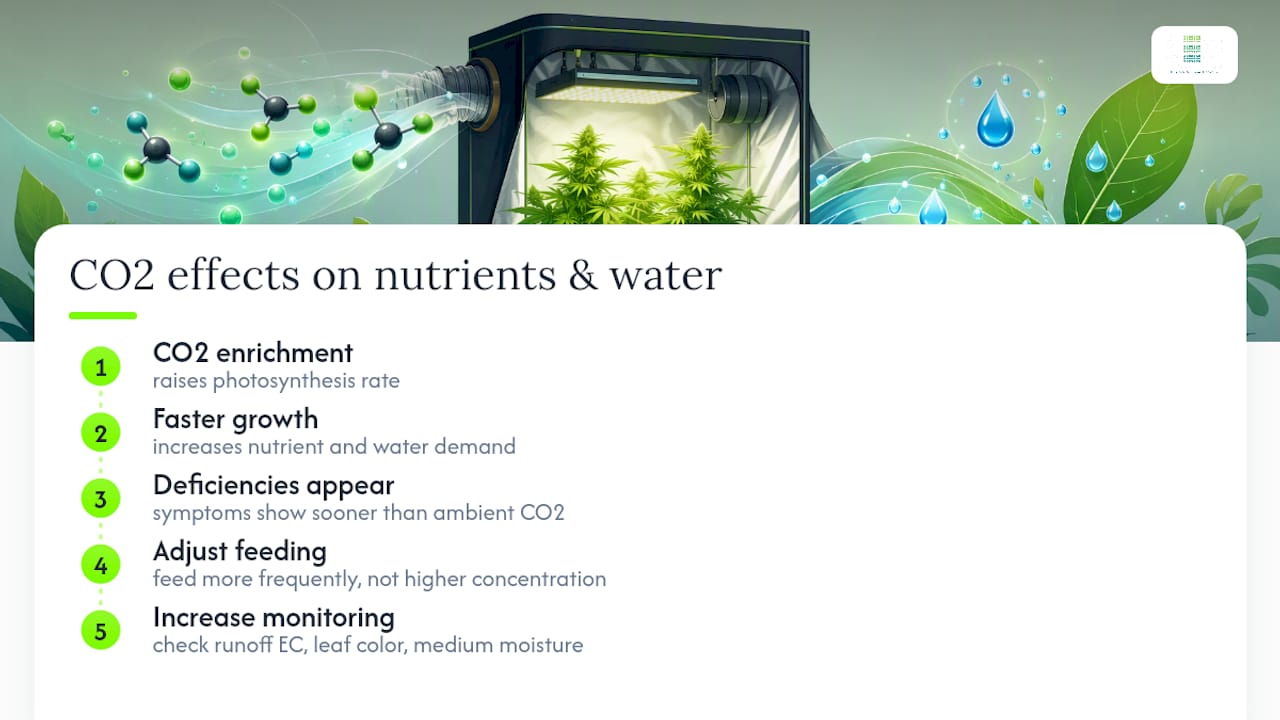
Elevated CO2 speeds up photosynthesis, and a faster-growing plant pulls nutrients and water at a faster rate too. This is one of the most common oversights among growers who add CO2 without adjusting their feeding schedule. A plant running hotter on carbon will often show nutrient deficiencies sooner than an identical plant at ambient CO2, simply because it’s cycling through its available nutrient reserve faster.
The practical fix isn’t necessarily feeding heavier concentrations. It’s feeding more frequently, or watching your runoff and leaf coloration more closely once CO2 enrichment kicks in. Growers running coco or hydro setups tend to notice this shift faster than soil growers, since soil buffers nutrient swings more than inert media does.
Watering schedules shift too, though less dramatically. Faster photosynthesis means faster water uptake through the roots and higher transpiration through leaves, especially when you’re also running the warmer temperature range that makes CO2 most effective. Letting your medium dry out on the same schedule you used before adding CO2 can leave plants stressed right when they’re growing fastest.
None of this means CO2 requires an overhauled feeding program. It means treating your nutrient and watering schedule as a variable that shifts once enrichment is active, rather than assuming a static schedule from your pre-CO2 grows still applies. Check runoff EC and soil moisture more frequently during your first enriched grow cycle until you know how your specific setup responds.
Most CO2 complaints trace back to a handful of repeat issues, and nearly all of them are fixable without new equipment.
Ppm readings won’t hold steady. This almost always means a sealing problem. Check zippers, cable pass-throughs, and duct connections. A tent that’s leaking air will never hold enrichment no matter how much CO2 you add.
No visible growth difference after weeks of enrichment. Check your light output first. If PPFD at canopy level is unremarkable, CO2 has nothing to amplify. This is the single most common reason growers conclude “CO2 doesn’t work,” when the real issue is a light bottleneck.
Passive product ran out faster than expected. Tent size and ambient temperature both affect consumption rate. A 20 day generator box rated for a 1.2 x 1.2 meter tent will deplete faster in a larger space or a leakier tent than advertised.
Sensor readings seem inconsistent or erratic. Check placement. A sensor too close to your CO2 outlet, or sitting in dead air with no circulation, will give you numbers you can’t trust.
Fruit flies or odor after starting DIY fermentation. This is a known downside of sugar-and-yeast setups. Keep the fermentation vessel sealed except for the output tube, and change the mixture on schedule rather than letting it sit past its productive window.
Controller cycling on and off rapidly. Widen your hysteresis buffer. A tight trigger threshold forces constant dosing pulses that waste gas and never let ppm stabilize.
The conventional advice online treats CO2 supplementation like a universal yield hack: buy a tank, dial in a ppm number, watch buds get bigger. That framing skips the prerequisite entirely. CO2 is an amplifier, not a fix, and amplifying weak light or a leaky tent just wastes money faster.
What the evidence actually supports is a sequencing argument. Fix your light distribution and your sealing first. Only then does CO2 enrichment have something real to work with. I’d also push back on the idea that more precision is always better. A grower running a single small tent under modest lighting doesn’t need a solenoid and controller stack; a passive bucket generator running six months on autopilot solves their actual problem with far less complexity and cost.
Where I’d prioritize differently than most guides: spend your first budget dollar on canopy-reaching light, not CO2 hardware. Enrichment on top of strong, even light produces the yield gains growers actually want. Enrichment on top of mediocre light produces disappointment and a higher electric bill.
— Scott
Once your tent is sealed and your CO2 method is chosen, the lighting underneath your canopy determines whether that enrichment actually shows up in your harvest. Plants can only use extra carbon where light is reaching leaf tissue, which means under-canopy coverage matters just as much as raw fixture wattage.
For compact tents running passive or fermentation-based CO2, the ThinkGrow LED Model-I delivers canopy-wide intensity sized for micro setups without overwhelming a small space with excess heat. Growers stepping up to a compressed tank system and pushing higher DLI targets should look at the Grower’s Choice ROI-E720, which gives enrichment something substantial to amplify. And for tents where lower bud sites are underperforming regardless of CO2 method, the Secondary Supplemental Lighting Proximity Cube system fills in under-canopy gaps that top-down fixtures miss entirely.
If you’re still mapping out ppm targets and controller logic, LedGrowLightsDepot’s TrolMaster Hydro-X CO2 Device Station integrates sensor readings and dosing control into one system built for exactly this use case. Browse the full lighting and environmental control catalog to match your tent size and CO2 method before your next grow cycle starts.
{"one"=>"Select 2 or 3 items to compare", "other"=>"{{ count }} of 3 items selected"}





Leave a comment